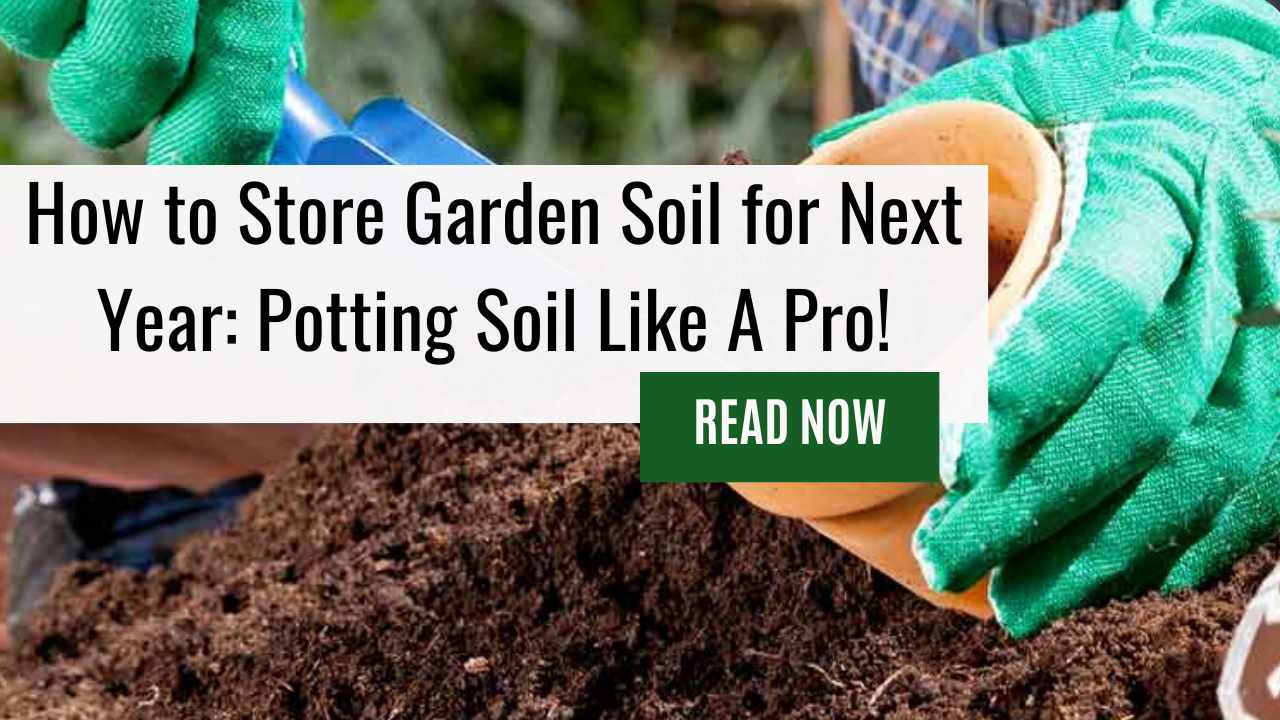
Are you looking for the best way to store garden soil from one year to the next?
If so, then you have come to the right place. This article will provide you with all of the information and tips that you need in order to properly store your garden soil.
You’ll be able to keep it healthy and ready for use again in no time!
Gardening is an incredibly rewarding activity. It brings beauty, color, and life into our homes and gardens. But gardening can also take a lot of hard work – especially about storing your garden soil!
To make sure your soil stays healthy enough to sustain another growing season, there are certain steps that must be taken during storage.
By following these easy-to-follow instructions, you’ll soon be mastering how to store garden soil for next year like a pro!
Read on for more details about what needs to be done before winter sets in so that you can ensure a successful planting season.
Supplies Needed – Storing Potting Soil in Bags or Storage Bins
Storing your garden soil for the following year is an important measure that will keep it healthy and ready to use when the time comes.
To get started, you’ll need a few supplies such as plastic bags and storage bins. When choosing these items, make sure they are large enough to fit all of your soil.
You should also double-check them for any cracks or holes that could allow moisture in and cause mold growth. And, you may want to purchase some protective gloves if you plan on transferring the soil by hand.
This will help ensure your safety while handling potentially hazardous materials like fertilizer or compost. Now that you have gathered all the necessary supplies, it’s time to start preparing your soil for storage.
Preparing Your Soil For Storage
Before you can store your garden soil for next year, it’s important to prepare the soil correctly.
Imagine a large storage bin filled with used soil – rich and alive with nutrients and minerals that will boost your plants’ growth in the coming season.
Preparing this precious material correctly is essential if you want to make sure it will be able to nourish your garden when it’s time to use it again.
The first step is to ensure all of the materials stored in your soil are completely dry before putting them into storage.
If any water remains, it could cause mold or mildew, which would render the soil useless for gardening purposes.
Once everything has been dried out properly, carefully sift through the material to remove any weeds, stones, or other debris that may have made its way into the mix during harvesting.
Once these tasks have been completed, you’re ready to begin storing your garden soil! You should place the soil in an airtight container and store it somewhere cool and dark such as a basement or garage.
Make sure not to store too much at once – leaving some room between each batch allows better airflow so there won’t be any potential issues down the road.
With these tips in mind, you’ll be able to confidently store your garden soil until you’re ready to use it again! Now let’s move on to different types of containers available for storing used soil.
Different Types Of Containers
Once you’ve prepared your soil for storage, the next step is to find a suitable container.
There are many options available depending on how much soil you need to store and whether it’s going to be used in the short term or long term.
Plastic totes can work well as they are airtight and have lids that snap shut tightly keeping moisture out. Larger plastic storage containers with wheels may also be an option if you plan on moving the soil from place to place.
If you’re looking for something more portable, then smaller food-grade buckets or airtight food storage containers could do the trick.
When choosing a container, make sure it has ample capacity for storing all of your soil without taking up too much space.
You should also consider any potential risks such as insects or rodents getting into the container and affecting its contents.
Finally, think about what type of material will best suit your needs so that you don’t end up having to buy new containers each time you want to use them.
With these considerations in mind, let’s look at some long-term storage considerations that come into play when selecting a container for your garden soil.
Long-Term Storage Considerations
To ensure the health and longevity of your garden, it is important to store extra soil for use next season. Potting soil can be stored in a variety of ways depending on available space and budget.
For smaller gardens, storing potting soil in large soil bags or airtight storage bins is usually the most practical.
Plastic storage containers offer an easy way to move the potting mix from one place to another without having to carry heavy bags around the yard.
The potting mix may also need to be kept away from any pests or animals that might eat it. Airtight storage bins will help keep out pests while keeping moisture levels low and preventing mold growth.
On larger properties, outdoor shelving units may provide the best option for long-term storage of potting soil.
Outdoor shelving units allow you to maximize space by taking advantage of vertical height as well as providing secure ventilation so that excess water drains away quickly reducing the risk of spoilage.
With this type of solution, make sure shelves are made with durable materials such as galvanized steel which won’t rust and corrode easily over time when exposed to wet conditions.
Taking these steps will ensure your stored garden soil remains fresh and viable for many years ahead!
As proper shelving requirements are met, gardeners can rest assured their investment in quality potting mix will last throughout multiple growing seasons
Shelving Requirements to Store Potting Soil
Storing garden soil for the following year requires careful consideration of shelving requirements.
Before deciding on a storage solution, it’s important to understand that old potting soil needs to be stored differently than new store-bought potting soil.
For example, while store-bought potting soil can simply be placed in an airtight container or sealed bag and stored away, reusing existing soil directly from your garden is not recommended.
When storing used gardening soil, you should first allow the dirt to dry out completely before transferring it into a container with a lid.
This will prevent mold growth and keep moisture at bay. It’s also essential to ensure proper ventilation when storing this type of material by providing adequate airflow around the containers.
If possible, use shelves made from wood or metal and place them away from direct sunlight and extreme temperatures.
Also, use plastic bins with lids that are designed for longer-term storage as these provide better insulation for temperature fluctuations over time.
Finally, controlling both temperature and humidity levels during storage is critical to preserving quality of the garden soil until the next season arrives.
Temperature & Humidity Control
Now that you’ve considered the requirements for shelving potting soil over winter, it’s important to examine temperature and humidity needs as well.
When storing potting soil for extended periods of time, maintaining a consistent environment is key to preventing mold growth or other issues with your stock.
To begin, find a place in your home or garden shed that stays at around 55-65°F (13-18°C). This temperature range will allow the soil to remain active while preventing excessive drying out.
Next, make sure there isn’t too much air moisture present; if excess water accumulates on top of the bags or buckets of soil you have stored, it can get soggy and start breeding bacteria.
Try to keep the relative humidity between 40%-50% by adding some desiccant packets into each bag or container before sealing them up tightly with lids.
Finally, check back periodically throughout the season—at least every two weeks—to ensure everything is staying within these guidelines and adjust accordingly when needed.
Maintaining Soil Quality for Future Use
Believe it or not, over 30% of the world’s soil is degraded due to factors such as erosion and pollution.
As gardeners, we must be mindful of maintaining the quality of our own soil for future use. To start, store your old potting soil in plastic storage bags or containers so that moisture does not accumulate.
This will prevent mold from forming and help maintain a higher level of quality compared to leaving the soil exposed outside.
And, if you have an abundance of leftover soil, consider adding some compost material to enhance its nutrient content as well as improve aeration.
Lastly, make sure to shake off any excess dirt on the surface before putting it away in order to reduce clumping when you are ready to reuse it next year.
With these simple techniques, you can ensure that your stored garden soils remain in top condition for many years ahead. Labeling & documentation is the key step in preparing for usage again next season.
Labeling & Documentation
With the soil quality maintained, it’s time to turn our focus toward labeling and documentation. Labeling your soil mix is essential for easy identification when you are ready to start planting in the spring.
You can create labels with permanent markers on plastic buckets or even use colored tape if storing in larger plastic totes.
For best results, take a photo of each labeled container so that everything can be documented and stored digitally as well.
The last step in preparing garden soil for next year is documenting what was used in each mix. Documenting all of the ingredients will help you keep track of any changes from season to season and ensure consistent results year after year.
It also allows you to refine your process by making adjustments where needed without having to guess what was used previously. By taking these steps now, you’ll save yourself a lot of headaches down the road!
Having taken care of proper labeling and documentation, it’s time to move on to composting for reuse.
Composting is an invaluable tool that helps maintain healthy soils while improving crop productivity and reducing water usage.
Composting to Reuse Potting Soil Over Winter
Composting is an easy and efficient way to store garden soil for next year.
Composting helps break down organic matter such as grass clippings, leaves, and vegetable peels into a nutrient-rich material that can be used to fertilize container plants as well as outdoor gardens.
When composting, it’s important to use the right ratio of browns (dead leaves) and greens (vegetable scraps) in order to get the best results. A good rule of thumb is two parts browns to one part greens.
Once you’ve gathered your materials, create layers with alternating piles of green and brown waste mixed together.
This will help ensure that everything breaks down evenly over time. You should also add a layer of potting mix or bagged manure between each layer of green/brown waste; this will provide essential nutrients for your soil when it’s finished decomposing.
Finally, make sure there is plenty of air circulating around your compost pile by adding more material on top if necessary.
When stored properly in an area where it won’t be disturbed by animals or humans, compost can last up to several years before needing replenishment.
It’s a great way to reuse old soil while providing much-needed nutrition for your plants! Testing for pests & pathogens is the next step in ensuring healthy soils for future growing seasons.
Testing For Pests & Pathogens – A Cruical Step of How to Store Garden Soil for Next Year
Before storing your garden soil for the upcoming growing season, you’ll want to check it for pests and pathogens.
Testing is easy: just take a small sample of soil and potting mix that’s been stored from last year’s crop, and inspect it closely.
Look out for signs of mold or mildew, as well as any other unusual growth. If there are any unwelcome guests in your soil, you may need to apply an appropriate insecticide before placing it back into storage.
It’s also important to test the pH level of your soil; this will help ensure plants get all the nutrients they need when grown in the future.
Take samples from different parts of your garden—this way you can be sure that the composition remains consistent throughout the entire area.
Finally, avoid cross-contamination by keeping each batch separate from others during storage. This simple process will go a long way toward ensuring healthy crops down the line!
Avoiding Cross-Contamination
If one pot of soil becomes infected with pests or pathogens, it can easily spread throughout your garden and damage all of your hard work.
To avoid cross-contamination, you must properly store any unused garden soil from year to year.
Before storing potting soil for next season, be sure to inspect it carefully for signs of infestation such as insects, fungal growths, or other organisms.
If these are present in a container of garden soil, discard it completely and start fresh with new gardening supplies instead of risking contamination.
When storing potting soil for future use, use an airtight container like a plastic bin or bucket and make sure there is no remaining moisture in the soil before sealing it up.
Besides, you can add a weak bleach solution (1 tablespoon per gallon) when filling containers to further prevent contamination during storage over winter months.
Properly stored potting soil will remain viable for reuse on your next gardening project without having to worry about introducing unwanted pests or diseases into your garden beds.
Reusing Soil From the Previous Year – The Use of Old Potting or Used Potting Soil
Reusing soil from the previous year is a great way to save money and time in terms of gardening. Potting soil can be reused, but it’s important to make sure that any used potting soil is properly stored before reusing it.
To ensure optimal storage conditions for old potting soil, find an area where the soil can remain dry throughout the winter months. This is especially important if you plan on using your garden bed again in the spring.
When storing your potting soil, keep it away from direct sunlight as this could cause it to break down faster than desired.
Airflow should also be taken into consideration; try not to store too much of your potting soil in one space as this may hinder its ability to breathe and stay healthy.
You’ll want to have enough room so air can move freely around your potting mix while still being covered or sealed off from outside elements such as pests or rainwater.
If done correctly, reusing potting soil from last year will result in healthier plants with better yields come planting season – plus more money saved! With these tips in mind, disposal options for old potting mix can now be explored…
Disposal Options – Best Ways to Store Potting Soil to Prevent Pests, Mold and Moisture!
With more people growing their own food, the need to reuse and store potting soil is increasing.
According to a recent survey by The National Gardening Association, 90% of home gardeners save and reuse potting soil from year to year.
This means that storing potting soil for next season can be one of the best ways to ensure your garden remains healthy and productive.
The most important thing about saving used potting soil is proper storage methods. It’s essential to keep the soil dry before storing it away in a container or on shelves.
If stored properly, this will prevent mold growth as well as potential pests like mites or bugs. Plus, you should also consider removing any old plant roots or weeds from the potting soil before sealing it up for long-term storage.
Finally, if you don’t have enough space at home to store your unused garden soil, there are other disposal options available such as composting or donating excess dirt to local community gardens or urban farms.
By taking measures like these, not only are you helping out others but also making sure that your valuable resources aren’t going to waste!
These steps can help create a greener environment while ensuring that your garden continues thriving with quality ingredients in future seasons.
Benefits Of Storing Garden Soil
Storing garden soil properly can be a great way to make sure you get the most out of your garden in future seasons.
When stored correctly, this soil will allow for more efficient use and help prevent any potential issues that could arise from using potting soil or bags of store-bought soil.
By storing garden soil throughout the winter months, you’ll also have access to nutrient-rich organic matter that’s perfect for growing next year’s plants.
The benefits of storing garden soil are numerous. For starters, it eliminates the need to purchase expensive bagged potting soils or fertilizers each season.
Also, by preserving the nutrients in your own soil year after year, you’re able to ensure optimal growth conditions for all types of plants.
Furthermore, with proper storage techniques, you won’t have to worry about pests infesting your valuable resource come springtime.
Finally, having a stockpile of quality garden soil ensures that you always have some at hand should an emergency occur – like when unexpected guests arrive and require immediate planting!
Storing enough garden soil means you can quickly plant vegetables and flowers without spending extra time shopping around for just the right type of dirt.
With careful attention paid to the preparation and proper storage methods now, you’ll never be caught off guard during gardening season again.
Frequently Asked Questions
How Often Should I Test My Stored Soil For Pests And Pathogens?
Testing your stored soil for pests and pathogens should be an essential part of gardening. After all, you don’t want any unwelcome guests wreaking havoc in the garden!
The frequency at which you test will depend on a few factors such as how much time has passed since storing it and what type of environment the soil is kept in.
Firstly, if you store the soil over winter, then testing every two to three months is recommended; this ensures that any issues are spotted quickly before they become unmanageable.
Also, monitoring humidity levels can also help identify potential problems with the stored soil – too high or too low might indicate infestations or other fungal diseases present within.
Regularly checking both moisture content and temperature can be beneficial when looking for signs of pest activity.
Furthermore, understanding the local ecosystem where your garden exists can provide insight into seasonal changes affecting stored soils.
For example, during springtime plants may flower early due to mild temperatures leading to increased insect activity near gardens – thus increasing the risk of pests entering stored soils from outside sources.
By being aware of these environmental conditions, we can ensure our soil remains healthy throughout storage and use in future years.
So there we have it: by testing your stored soils regularly and keeping abreast of changing weather patterns, you can stay one step ahead of pesky pests and keep your garden blooming each year!
Are There Any Special Labeling Or Documentation Requirements For Stored Soil?
Labeling and documenting your stored soil can help protect both yourself and other people who come into contact with it.
Labels should clearly state the type of material being stored, its source, date of storage, and intended use. You may also want to include additional information such as pesticides used on the plants grown in the soil.
Depending on where you live, local regulations may require more specific labels than just these basics.
Documentation is equally important in order to keep track of which soils are currently being stored, how long they’ve been left undisturbed, and whether any changes have occurred over time.
On top of that, documents will provide evidence if a dispute arises regarding ownership or contamination of the soil at some point down the line.
These records should be kept up-to-date throughout the entire process and easily accessible by anyone who might need them in case of emergency.
Storing garden soil for next year requires careful consideration with regard to labeling and documentation requirements – not only from a safety standpoint but also from a legal one.
Take time to familiarize yourself with all the necessary guidelines before beginning this process so that nothing gets overlooked!
How Long Can I Store Garden Soil In A Container Before It Needs To Be Replaced?
The lifespan of stored garden soil depends largely on its environment. If exposed to moisture or pests, the stored soil will deteriorate much more quickly than when kept dry and pest-free.
In most cases, well-stored garden soil should remain usable for up to five years if kept away from any potential contaminants.
However, some types of soils may need to be replaced sooner depending on their composition and use case.
To get the best results out of storing your garden soil, make sure you select an airtight container with a lid that seals tightly.
This is key because it prevents moisture and pests from entering while also maintaining necessary oxygen levels within the container itself.
Moreover, labeling each container with details like the date put into storage and intended use can help keep track of what’s been stored over time.
Taking these steps will help maintain top-notch quality in your stored garden soil for many seasons ahead!
Are There Any Benefits To Composting Stored Soil Before Reuse?
When you compost stored soil, you’re essentially creating an environment where beneficial microorganisms can flourish.
This helps break down organic material like leaves or grass clippings into rich humus which acts as a natural fertilizer and increases the nutrients available to your plants.
Compost also improves the structure of your soil by increasing its water retention capacity, making it more resistant to drought conditions and less likely to erode away due to heavy rains.
And, compost creates better aeration in your soil which allows oxygen-rich air particles to penetrate more easily and benefit root growth.
So what steps should you take if you want to start composting stored soil?
The most important factor is ensuring that there’s a balance between carbon (brown materials) and nitrogen (green materials). You then need to mix these together with some water until they form a moist crumbly texture – not too wet or dry – before adding it back into the existing container of soil.
Once added, keep an eye on moisture levels while stirring occasionally so that everything breaks down evenly over time.
Finally, let nature do its thing! With all those microorganisms working their magic, your prepared soil will be ready for use shortly after several weeks have passed.
Composting stored soils may seem complex at first but with just a little bit of effort, it can make all the difference when it comes time for planting season again next year.
Careful preparation now will pay off later with higher yields from healthier crops – something every gardener wants!
Are There Any Special Considerations When Storing Soil In A Garage Or Shed?
Storing soil for reuse in the next gardening season can be a great way to save money and time.
But as for storing this precious resource, there are some special considerations that must be taken into account – especially if you plan on saving your soil in an outdoor shed or garage.
To ensure the longevity of your stored soil, let’s take a closer look at what needs to be done before putting away those bags for later use.
First off, it’s important to make sure any potential contaminants from surrounding areas have been removed from the soil.
This could include anything from debris like twigs and stones, as well as any weed seeds that might still be present.
Besides, if you plan on composting your soil before storing it, make sure all organic material has decomposed thoroughly and is free of disease-causing pathogens.
Finally, once you’ve ensured the safety of your soil, it’s essential to protect it against environmental factors such as moisture and extreme temperatures which could damage its composition over time.
Consider adding an extra layer of insulation around your storage container by using materials such as a plastic wrap or bubble wrap – not only will this help keep out pests but also maintain optimal humidity levels within the soil itself so it can stay viable for years.
Summing Up
To sum up, storing garden soil for next year requires careful consideration.
The key is to test the stored soil regularly for pests and pathogens, label it properly, replace it after a certain period of time, and consider composting it before reuse.
Also, if you are planning on keeping your stored soil in an outside shed or garage there are some special considerations that need to be taken into account.
Overall, having a store of healthy garden soil can make all the difference between success and failure when planting next season’s crops.
It’s essential that you take steps now to ensure your soil’s longevity by taking proper precautions while storing them away – I mean why settle for anything less than amazing results?
By devoting just a little bit of effort today to preparing your soil for storage, you’ll have truly incredible outcomes almost guaranteed come springtime!
So don’t let another growing season pass without making sure you’ve got plenty of quality garden soil ready to go – trust me, the reward will be like no other!
Leave a Reply