Are you ready to take your gardening game to the next level?
Transplanting pepper plants may seem like a challenging task, but with the right techniques and knowledge, it can be an easy way to improve the health and yield of your peppers.
In this article, we’ll go over everything you need to know about transplanting pepper plants so that you can confidently move them from their seed trays to larger containers or garden beds.
Transplanting is a crucial step in the growth process for many plants, including peppers.
It allows them more space to grow roots and access nutrients while also providing protection from pests and disease.
Plus, moving your pepper plant into a larger container or bed will give it room to flourish and produce even more delicious fruit.
With our expert tips and tricks, you’ll be able to successfully transplant your pepper plants without any stress or worry. Let’s get started!
Understanding When To Transplant Pepper Plants
Amidst the vibrant hues of your garden, little seedlings emerge from the soil. These sprouts represent a new beginning – one filled with hope and potential for growth.
Among these plants are your beloved pepper plants, whose fruit you eagerly anticipate. But how do you ensure that they thrive?
Understanding when to transplant pepper plants is crucial in ensuring their success.
As a general rule, most pepper plants should be transplanted when they have developed at least two sets of true leaves. True leaves refer to the first set of leaves that appear after the cotyledons or seed leaves.
When these young seedlings outgrow their initial container, it’s time to provide them with more space so they can develop strong root systems and grow into healthy mature plants.
However, timing is not the only consideration when transplanting pepper plants; there are other factors to keep in mind as well.
Preparing The New Planting Location for the Hot Pepper Seedlings – Growing Pepper Plants Indoors or Outdoors!
Now it’s time to prepare the new planting location.
First, choose a spot that has good soil drainage and receives at least six hours of sunlight per day. Pepper plants grow best in well-draining soil with a pH level between 6.0 and 7.0.
If the area does not meet these requirements, consider adding compost or other organic matter to improve the soil quality.
Next, remove any weeds or rocks from the area where you plan to transplant your peppers. Make sure there is enough space for each plant to grow without crowding its neighbors.
Once you’ve cleared the area, dig holes slightly larger than the root ball of each pepper plant and fill them with water before placing the plants inside.
Be gentle when handling your transplants as they can be easily damaged in this stage.
With proper care and attention, your pepper plants will thrive in their new home!
Now that you have prepared the new planting location for your pepper plants, it’s time to think about choosing the right container if you are planning on growing them indoors or on a patio.
A suitable container should be large enough for adequate growth but also easy to move around if necessary.
It should also provide good drainage so excess water doesn’t accumulate around the roots of your plants, which can cause damage over time.
Let’s explore some options for containers that will give your pepper plants everything they need to flourish!
Choosing The Right Container – How the Right Pot Makes a Difference!
Choosing the Right Container is like choosing a partner in life. You want to make sure it’s the perfect fit for your pepper plants, just as you would want someone who complements your personality and lifestyle.
Containers come in different shapes, sizes, and materials such as plastic or clay. It’s essential to pick one that suits the size of your plant so it can grow comfortably without any crowding issues.
For example, if you’re growing squash in containers, choose one with at least a 5-gallon capacity since they tend to have extensive root systems.
Aside from considering the right container size, you also need to think about drainage holes.
Without proper drainage, water will accumulate in the soil leading to root rot and other diseases that may stunt growth or even kill your plants before they reach maturity.
Moreover, starting squash from seed requires a shallow pot with sufficient space for roots to spread out properly.
Be mindful not only of how much soil you’ll need but also of its quality since this plays an enormous role in ensuring successful transplantation while minimizing transplant shock on your pepper plants.
In the next section, we’ll discuss gathering the necessary tools required for planting.
Gathering Necessary Tools to Start Pepper Transplantation of Multiple Seedlings
Before you start transplanting your pepper plants, make sure to gather all the necessary tools.
You’ll need a trowel or small shovel, gloves, a watering can or hose with a gentle spray nozzle, and if you’re planting multiple plants, some stakes, and ties to keep them upright.
Another tool that may come in handy is a soil thermometer.
If the temperature of your soil isn’t at least 60°F (15°C), it’s too cold for peppers to thrive. If this is the case, wait until the weather warms up before attempting to transplant.
Now that you have everything ready let’s move on to transplanting squash seedlings! Summer squash is an easy vegetable to grow and will provide plenty of delicious fruits throughout the season.
Preparing The Soil To Transplant Pepper Seedlings
Preparing the soil is a crucial step in transplanting pepper plants. Before you plant your seedlings, make sure that the soil has been prepared properly to provide them with the best possible start.
The first thing you need to do is choose an area of your garden that gets full sun for most of the day.
Once you have found a suitable spot, clear away any debris or weeds from the area and dig up the soil. You want to create a bed that is rich in nutrients and well-draining so that your peppers can thrive.
Add compost or manure to enrich the soil, then mix it thoroughly until it is evenly distributed throughout the planting bed.
Once this step is complete, move on to watering the plants before transplanting for optimal results.
Now that you’ve got your soil ready, it’s time to give your seedlings a good drink of water before moving them into their new home.
Watering The Plants Before Transplanting
Watering your plants before transplanting is like giving them a final nourishing hug before they leave the nest. It’s essential to ensure their survival and growth in their new environment.
Before making any moves, it’s crucial to water your pepper plants thoroughly, so they are hydrated enough for the transition.
If you’re planning on growing squash alongside peppers, now would be an excellent time to start squash seedlings indoors from seeds.
You can plant your squash seedlings around two weeks after transplanting your pepper plants.
By then, the peppers should have settled into their new home and will not compete with the young squash seedlings for nutrients and space.
Water both plants regularly while keeping a watchful eye out for pests or diseases that may affect their growth.
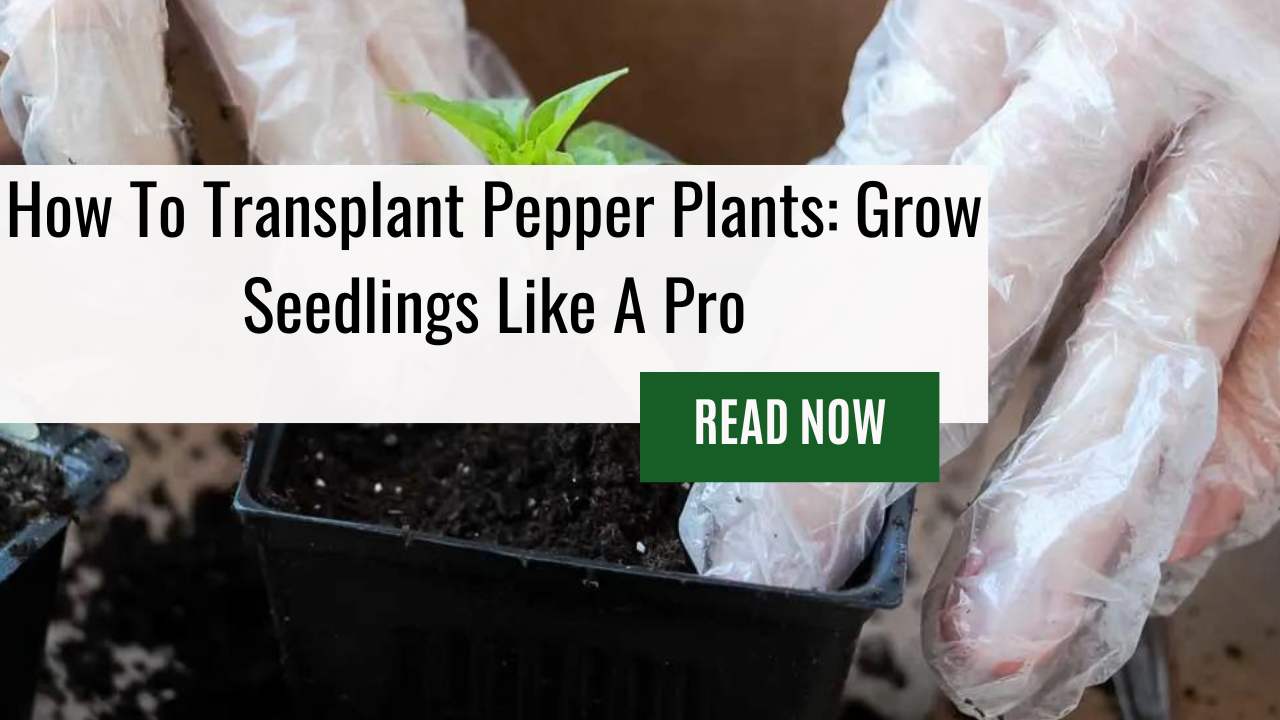
Gently Removing The Pepper Plants
Now that you have prepared the new location for your pepper plants, it is time to gently remove them from their current home.
First, water the soil around the base of each plant thoroughly. This will help loosen the roots and make it easier to remove them without causing damage.
Next, use a garden spade or trowel to dig carefully around each pepper plant. Make sure to go deep enough so that you are also removing as much of the root system as possible.
Once you have dug all the way around, gently lift the plant out of its hole by grasping it at the base of the stem and pulling it upwards with a slight twisting motion.
Be careful not to pull too hard, as this could cause damage to both the roots and stem.
With these steps completed successfully, we can move on to pruning before transplanting our pepper plants in their new location.
Pruning The Plants Before Transplanting
Did you know that pruning your plants before transplanting can actually increase their chances of survival?
It’s true! By trimming back some of the leaves and branches, you’re reducing the amount of stress on the plant’s roots, allowing them to focus on establishing themselves in their new location.
Also, pruning promotes healthier growth by redirecting the plant’s energy towards developing stronger stems and producing more fruit.
Before you start transplanting your pepper plants, take a moment to assess which areas need to be pruned.
Remove any damaged or diseased leaves or branches, as well as any suckers (small shoots growing between larger stems).
This will not only help prevent the spread of disease but also ensure that all nutrients are directed toward healthy parts of the plant.
Remember to also prune off any flowers or fruits present on the plant – while it may seem counterintuitive to remove potential harvests, doing so will allow your young pepper plants to grow strong enough for more fruitful yields later on.
This same principle applies if you plan to transplant squash; start squash seedlings indoors from seeds about 4 weeks before planting outside or use transplants purchased at garden centers for an earlier crop.
Placing The Plants In The New Location
Now that your pepper plants are ready for transplant, it is time to place them in their new location.
If you are also planning to transplant squash, make sure to keep the two types of plants at least three feet apart from each other as they may compete for nutrients and water.
When finding a spot for your pepper plant, choose an area with well-draining soil that receives full sunlight.
Make sure the hole you dig for each plant is deep enough so that the top of the roots will be level with the surrounding soil or slightly below.
Once you have placed all of your pepper plants in their new home, it’s time to start squash!
Following similar steps as above, ensure adequate spacing between each squash plant and consider adding companion plants such as marigolds around them to help deter pests.
Watering And Fertilizing After Transplanting – Avoiding Pepper Transplant Shock
After transplanting your pepper plants, it is important to give them the proper care and attention they need to thrive in their new environment. This includes watering and fertilizing on a regular basis.
Watering after transplanting is crucial because the roots of the plant have been disturbed during the transplant process.
To prevent shock or dehydration, water your plants thoroughly immediately after planting. After that, make sure to keep the soil consistently moist but not waterlogged.
As your pepper plants continue to grow, increase the frequency of watering if necessary.
Fertilizing is also important for healthy growth and fruit production. Use a balanced fertilizer with equal parts nitrogen, phosphorus, and potassium (N-P-K) every two weeks during the growing season.
Be careful not to over-fertilize as this can harm your plants instead of helping them.
With proper watering and fertilization, you can ensure that your newly transplanted pepper plants will flourish in their new home.
As you move forward with caring for your transplanted pepper plants, monitoring their progress is essential.
Keep an eye out for any signs of pests or diseases and take action promptly if needed. And, observe how well they are adapting to their new location and adjust their care accordingly.
By staying attentive and proactive, you can help guarantee a successful harvest from your freshly transplanted peppers!
Monitoring The Plants After Transplanting – Maintaining The Fruit of Your Labor
After transplanting your pepper plants, it’s important to monitor them closely to ensure they are adapting well to their new environment.
The first few days after transplanting can be stressful for the plant, so keeping a close eye on them will help you catch any issues early on.
One of the most important things to monitor is watering. Newly transplanted plants need more water than established ones since they have not yet developed a strong root system.
However, overwatering can also be detrimental to the plant’s health. Check the moisture level of the soil frequently and adjust your watering schedule accordingly.
Plus, keep an eye out for pests or diseases that may begin to affect your plants after transplanting. Early detection and treatment can make all the difference in ensuring your peppers thrive in their new home.
As you continue monitoring your newly transplanted pepper plants, remember that there may still be some challenges ahead.
In the next section, we’ll discuss common issues that arise during transplanting and how to troubleshoot them effectively.
Troubleshooting Common Transplanting Issues
Transplanting can be a tricky process, and even the most experienced gardeners can run into some common issues.
But don’t worry, troubleshooting these problems is all part of becoming an expert at transplanting! Like learning to ride a bike without training wheels, it takes practice and patience.
One issue you may encounter when transplanting seedlings is called ‘transplant shock.’ This happens when the plant experiences stress from being uprooted from its original container or location.
Symptoms of transplant shock include yellowing leaves, wilting, stunted growth, and even death in severe cases.
To prevent this issue, make sure your plants are well-hydrated before transplanting and avoid disturbing their roots as much as possible during the process.
If you do notice signs of transplant shock after planting, give your plants extra care by watering them more frequently until they recover.
Another potential problem with transplantation is mixing up different varieties of squash (or any other plant) that look similar but have different growing requirements.
For example, if you accidentally mix up winter and summer squash seedlings while transplanting them into the same bed, one variety may outgrow the other or require different amounts of water and sunlight.
To avoid this issue, label each plant clearly with its corresponding variety name so that you can keep track of which ones need specialized care.
With time and practice, you’ll become a pro at troubleshooting common issues like these and ensure healthy growth for all your transplants!
Frequently Asked Questions
How Long Should I Wait After Transplanting Before Harvesting Peppers?
Well, the answer depends on a few factors such as the variety of pepper and growing conditions.
Generally speaking, it’s best to wait until the peppers are fully ripe and have changed color from green to their designated hue (red, orange, yellow, etc.).
This may take anywhere from 50-90 days after transplanting depending on the specific type of pepper plant.
Remember to keep an eye out for any signs of disease or pests that could affect growth and development. With patience and care, you’ll soon be savoring those homegrown peppers in all their flavorful glory!
Can I Transplant Pepper Plants During The Hottest Part Of The Day?
The answer is simple: no.
While it may be tempting to get things done quickly, transplanting in extreme heat can shock your pepper plants and cause damage that will affect their growth and yield.
Instead, opt for cooler morning or evening hours when temperatures are more mild.
Remember, successful gardening requires patience and attention to detail – so take your time and give your peppers the best possible chance at thriving!
Should I Remove Flowers And Buds From The Pepper Plants Before Transplanting?
Before transplanting pepper plants, it is important to consider removing the flowers and buds from them.
While this may seem counterintuitive, doing so will allow your plant to focus its energy on establishing new roots rather than producing fruit.
However, keep in mind that if you want an early harvest, leaving some flowers or small fruits can help stimulate growth.
Ultimately, the decision to remove flowers and buds before transplanting depends on your goals for your pepper plant.
By making informed decisions like this, you’ll be well on your way to mastering the art of gardening!
How Often Should I Water Newly Transplanted Pepper Plants?
The answer may vary based on factors such as climate and soil type, but a general rule of thumb is to keep the soil consistently moist without oversaturating it.
This means checking the soil daily and giving it a good soak when it starts to feel dry about an inch below the surface.
With proper watering habits, your newly transplanted pepper plants will have a strong foundation to grow and thrive in their new environment.
What Are Some Common Signs Of Shock In Pepper Plants After Transplanting?
After transplanting your pepper plants, it’s important to keep an eye out for any signs of shock. These can include wilting leaves, yellowing foliage, and slowed growth.
Don’t panic if you notice these symptoms – they’re common after transplanting and usually don’t indicate a serious problem.
Instead, focus on giving your peppers the care they need to recover from the shock. Make sure they’re getting enough water and sunlight, but be careful not to overdo either one.
With a little patience and attention, your newly transplanted peppers will soon be thriving in their new home!
Summing Up
Transplanting pepper plants may seem like a daunting task, but with the right knowledge and techniques, it can be a breeze.
And let me tell you, once those peppers start growing in full force, it will be worth every bit of effort!
So don’t wait any longer – get out there and transplant those babies!
Remember to give them plenty of water and shade during these hot summer days, remove any excess buds or flowers before transplanting, and keep an eye out for signs of shock.
With a little TLC, your newly transplanted pepper plants will thrive and produce some seriously delicious peppers that will make all your gardening friends jealous.
Happy planting!

Leave a Reply