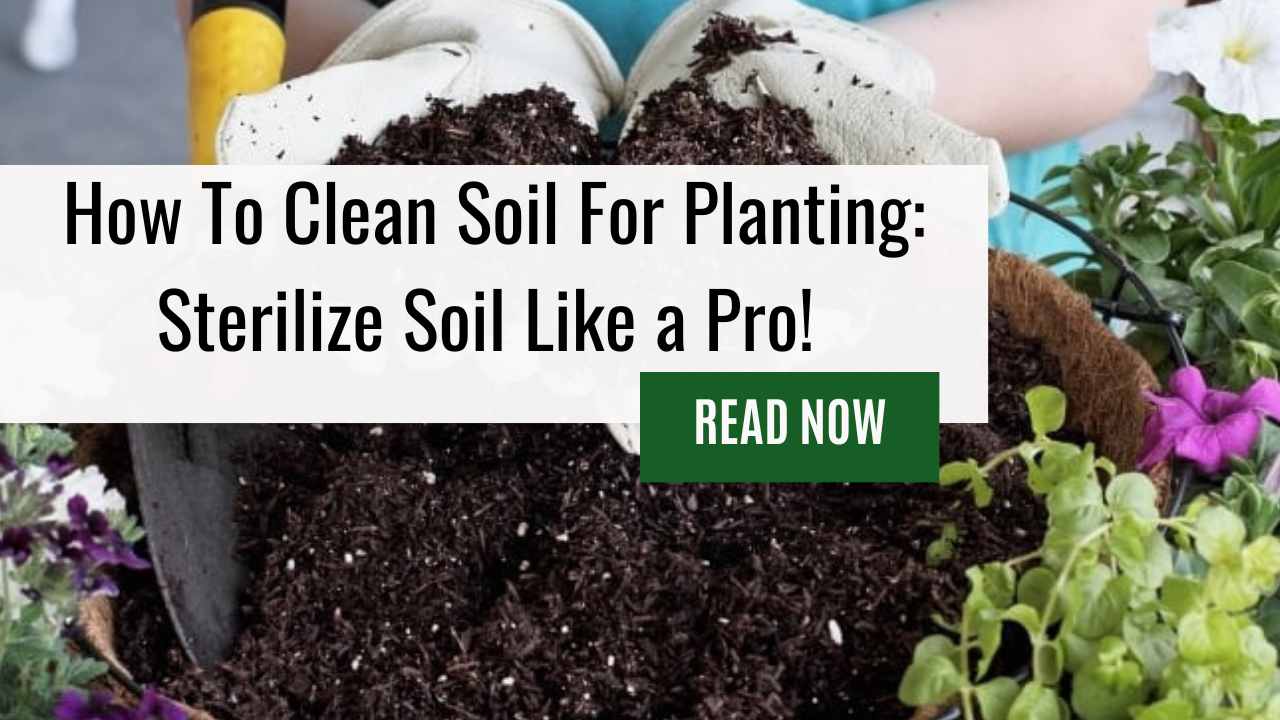
Soil is the basis of any successful gardening endeavor, yet it can be one of the most difficult parts to manage.
Many gardeners find themselves in a seemingly endless cycle of trying to clean soil for planting but not quite getting it right.
It is an arduous task that requires patience and knowledge – two things many gardeners don’t have or are too busy to acquire!
Luckily, there is a way to make this process easier and more effective with some simple steps.
Despite its appearance, cleaning soil for planting isn’t as challenging of a task as you may think; just follow these easy guidelines and you will soon be cultivating your green paradise!
Soil preparation plays an integral part in every gardener’s success story – whether they realize it or not!
Preparing soil properly ensures that plants receive enough nutrients from the environment while also allowing them to thrive in their new home.
Cleaning soil for planting involves removing debris such as rocks, sticks, roots, and other organic materials before adding fertilizer or compost.
This step can seem tedious however doing so gives plants the best chance at flourishing by providing ample space for root growth which improves nutrient absorption.
At first, though, cleaning soil for planting might sound like an impossible dream; after all, who has time to sift through the dirt?
But fear not – with the right tools and know-how anyone can transform even the filthiest plot into fertile ground ready for growing delicious fruits and vegetables.
To get started on this journey towards mastery over nature read on to learn how easy it is to clean soil for planting!
Why Sterilize Soil Before Planting?
Soil is an essential element in any successful planting. Preparing the soil correctly is important for a healthy crop, and sterilizing it can reduce the risk of contamination from disease-causing pathogens or weeds.
Sterilization also helps to create ideal conditions for growing plants by removing existing living organisms that may compete with them for nutrients.
There are several methods available to clean soils before planting, including using potting soil or heat treatments such as steam sterilization or solarization. Besides, some gardeners use hydrogen peroxide to sterilize their soil.
Assessing the quality of the soil before planting is necessary to ensure its suitability for a given purpose.
This requires testing for pH levels, nutrient content, and moisture as well as conducting visual inspections for a foreign matter like rocks and debris.
An understanding of these factors will enable informed decisions on whether additional treatment (e.g., adding fertilizer) is required before planting begins.
Therefore, taking steps to assess and prepare soil beforehand can make all the difference between success and failure when starting a new garden project.
Assessing Soil Quality and Ways to Sterilize Soil at Home
Assessing the quality of soil is essential before beginning to prepare it for planting.
Garden soil should be checked for nutrient availability and texture, as well as pH balance.
The best way to determine these characteristics is with a commercial soil testing kit that can provide an analysis of the nutrients and minerals present in your soil sample.
If there are any deficiencies, amendments such as fertilizer or compost may need to be added.
The type of soil being used also matters when preparing it for planting.
Soil and potting mixes have different compositions; soil holds more water and organic matter than soilless media while providing better aeration and drainage than garden soils do.
It’s important to use the right mix for each project, as using the wrong one could lead to unfavorable growing conditions.
And, if you plan on reusing containers from previous projects or buying pre-used ones, they will need to be sterilized before use to prevent diseases or pests from transferring over into the new plants.
Before adding anything else to the soil, debris like rocks, roots, twigs, leaves, weeds, and other materials must first be removed since they can compromise root growth and impede proper drainage.
Removing this material helps create an environment where plant life has room to grow without obstruction.
Removing Debris and Sterilizing Soil with Hydrogen Peroxide
Removing debris and sterilizing the soil are two important steps that should not be overlooked when preparing to use the soil.
The first step in cleaning up soil is removing any visible debris such as rocks or dead leaves that may have accumulated over time.
To do this, spread out a plastic sheet on an outdoor surface and gently place the soil onto it. Gently sifting through with your hands can help separate large pieces of debris from smaller particles like sand.
Once all of the obvious debris has been removed, you can move on to sterilize the soil with hydrogen peroxide before using it for planting.
Hydrogen peroxide is a great way to sterilize dirt because its oxidizing properties break down bacteria found naturally in moist soil.
The amount used depends on how much area needs to be treated; generally, a 3% concentration will work well enough for most applications but higher concentrations may also be necessary depending on what kind of plants you plan on growing in this particular patch of soil.
To apply hydrogen peroxide, simply pour it directly onto dry patches of ground and wait at least 10 minutes before proceeding further so that it can take effect properly.
Afterward, rake the area thoroughly until everything looks evenly distributed, and then let sit overnight before moving forward with other gardening activities.
With these simple steps completed, you’ll have successfully cleaned up any unwanted materials and made sure your new garden space is ready for whatever type of plant life you choose!
Selecting The Right Tools And Materials for Soil Sterilization
As for selecting the right tools and materials for preparing the soil for planting, there are a few important aspects to consider.
Sterilizing your soil is one of the most important steps as it helps eliminate any unwanted organisms or pests that may be present.
There are several ways to sterilize your soil using various methods such as heat, steam, or chemical treatments.
For individuals who need large amounts of soil prepared quickly, heating can be the best option. This involves baking the soil in an oven at temperatures between 150-180 F (65-80 C).
It should be noted however that this method requires more energy than other options, so if you plan on doing this regularly, you should consider investing in an industrial-grade oven.
The use of steam is another effective way to sterilize soil with minimal effort and cost compared to other methods.
This procedure involves applying high-temperature steam directly onto the surface of the soil which works by killing any insects or larvae living inside it.
Moreover, steaming also loosens up heavy soils making them easier to work with during planting season.
Chemical treatments are another popular method used to sterilize soil but caution must be taken when handling these products because they can potentially harm plants and humans if handled incorrectly.
Before beginning any treatment process make sure to follow all instructions provided by manufacturers carefully and always wear protective equipment when working with chemicals.
Testing for chemical contamination after a chemical treatment is recommended before proceeding with planting activities.
Testing For Chemical Contamination – An Essential Step of How to Clean Soil for Planting
After gathering the necessary tools and materials, it is important to begin testing for chemical contamination in the soil.
For example, consider a bag of store-bought soil that needs to be used in a vegetable garden. Before planting any vegetables or fruits, it’s essential to clean this soil to ensure its safety and prevent potential harm from unknown contaminants.
The process of cleaning soil includes sterilizing the soil as well as adding additional amendments such as compost and lime.
The first step in cleansing the soil is to determine if there are any hazardous chemicals present by having it tested at an accredited laboratory.
This can help identify any potentially dangerous metals or minerals that need to be removed before use. Plus, checking for pH levels will also provide information about which types of plants would thrive best in the cleaned soil.
After having the results back from the lab, it’s time to make any adjustments needed so that the soil can support the healthy growth of whatever crops have been chosen.
By using organic matter like compost or manure, one can add nutrients to the dirt while improving its overall structure and texture.
Mixing these natural additives with existing soils helps keep them loose enough for air and water absorption without becoming too dense or compacted over time.
Besides, applying lime helps neutralize acidity levels while providing calcium and other trace elements beneficial for plant life.
With all these treatments applied properly, both physical and chemical dangers should be eliminated from the initial source material making it safe for cultivation purposes.
Aeration And Composting Methods for Sterilizing: Baking the soil in your oven & Sterilizing Potting Soil
Aerating the soil with steam is one method that can help to loosen compacted soils, allowing oxygen back into the mix and improving drainage.
The process of aeration also removes excess salts from clay-based soils which may be toxic to plants.
Baking in an oven at a high temperature will kill any disease organisms, weed seeds, or insects present in the soil while adding beneficial minerals such as phosphorus and potassium.
This baking process has many benefits including sterilizing the soil before use and reducing the risk of diseases being transmitted to new plantings.
When using potting mixes, it is important to select a quality product with low levels of pathogens and pests. To sterilize these mixes before planting, heating them with water vapor or autoclaving (steam heat) is recommended by some experts.
For those who prefer more natural approaches to sterilization, there are other methods such as solarization (using sunlight) or drenching with boiling water that can be used instead.
These alternative methods take longer than traditional processes but have fewer environmental impacts on local ecosystems.
As well as providing essential nutrients for healthy growth, organic matter helps improve moisture retention in soils so they don’t dry out too quickly between watering cycles.
Compost provides not only a rich source of fertilizer but also acts as a shelter for beneficial microorganisms that keep soil healthy and productive over time.
Beneficial Microorganisms
After aeration and composting methods have been used to help create a healthy soil environment, the next step is to moisten and penetrate the soil to begin planting.
To do this, gardeners should first ensure that there is an adequate temperature range for seed germination as well as plant growth.
This can be accomplished by spreading out the soil over a larger surface area which will allow it to dry or warm faster.
The goal of moistening the soil is two-fold: to increase water-holding capacity and improve drainage; both factors are essential for most plants’ health.
Moisture content needs vary depending on plant types, so gardeners need to adjust their watering schedules based on what they are growing.
Also, if necessary, sterilizing garden soil may be required before seeds germinate or transplants grow properly.
This can be done either with steam or chemical treatment, though some more natural alternatives exist such as solarization or crop rotation.
Once these steps have been taken, beneficial microorganisms can then be introduced into the soil system.
These organisms include bacteria, fungi, and protozoa which break down organic matter and release nutrients into the root zone of plants thus helping them absorb those valuable resources easier while also suppressing bad pathogens that could harm crops.
With proper care given to moisture levels, nutrient availability, and disease prevention strategies in place – gardens can thrive!
Natural Fertilizers
Preparing the soil before planting will ensure that plants are provided with essential nutrients and minerals, and it also helps to create a hospitable environment for roots to grow and thrive.
Natural fertilizers can be used to help reach or maintain the desired levels of fertility in soil mix.
Organic compost is one popular option as it not only provides plant-essential nutrients such as nitrogen and phosphorus but also improves water retention by adding organic matter into the soil.
Composted manure from horses, cows, sheep, chickens, rabbits, etc., can all be beneficial when added to fresh potting soil at rates recommended on bagged potting soils available in retail stores.
Furthermore, green manures—plants grown specifically for their ability to add nitrogen and other elements back into the soil—are another form of natural fertilizer often used among gardeners.
Incorporating natural fertilizers into a soil mix has many benefits including improved drainage and aeration while providing essential nutrients necessary for healthy growth.
It is important to note that overuse of organic material may inhibit plant growth due to excess salts being present in the soil; therefore proper research should be conducted before applying any type of fertilizer or amendment.
Transitioning into this topic further, amendments can be added to improve soil structure which will then provide better support for root systems during periods of drought or heavy rainfalls.
Adding Amendments To Improve Soil Structure
Soil that is used for planting should be cleaned before use to rid it of pests, weeds, and other debris. The most effective way to do this is to bake the soil in an oven at 200 degrees Fahrenheit for one hour.
This kills any harmful organisms and ensures a sterile environment when planting. It’s important to note that baking soil may release toxic fumes so make sure your kitchen is well-ventilated during this process.
If you don’t have access to an oven, then there are ways to clean soil at home without using heat.
A simple method involves layering plastic over the top of the soil and leaving it in direct sunlight for several hours or even days depending on how much sun exposure the area gets.
This will kill both fungal spores as well as weed seeds; however, some organisms may survive if they’re deep enough within the soil particles.
For potting soils, removing large chunks of debris can be done without heating but always read labels carefully because many commercial potting mixes come pre-sterilized with chemicals like formaldehyde which could harm plants if not properly handled.
To remove small pieces such as rocks or twigs, simply layer a sheet of plastic over the top of the soil and sift out all unwanted materials until only a fine layer of dirt remains underneath the plastic sheeting.
Regardless of which cleaning method you choose, once finished you’ll need to amend your soil accordingly by adding organic matter like compost or manure to improve its structure before beginning your next step towards balancing ph levels in preparation for growing healthy plants.
Balancing pH Levels
Balancing the pH levels in the soil is like hitting a bullseye with an arrow. It requires precision and accuracy to make sure that plants can thrive in their environment.
To achieve this, it’s important to boil for 20 minutes any non-composted material that is used to sterilize the soil before planting. This will help reduce the risk of contamination from bacteria or fungi.
Also, heat can be used to balance out soil acidity and alkalinity. Wetting the soil with distilled water before boiling helps ensure minerals are evenly distributed throughout the clean soil.
As long as these steps are taken carefully, pH levels should remain balanced enabling healthy plant growth.
Ultimately, being aware of how different elements interact within your garden’s ecosystem allows you to create an ideal environment for successful cultivation.
Preparing A Site For Planting
When preparing a site for planting, it is important to clean the soil. To do this, place the soil in an oven at a low temperature and allow it to bake for about 30 minutes.
After baking, turn off the heat and allow the soil to cool before checking its surface for any residue or debris that may have been left behind.
If necessary, repeat the process until all of the debris has been removed from the soil’s surface. Once done, you will be ready to begin planting on your newly prepared site.
Timing considerations are also important when preparing a site for planting.
To determine when it is ideal to start cleaning and working with your soil, consider factors like weather patterns and local climate conditions as well as seasonal changes in temperatures and moisture levels.
Doing so can help ensure that your plants receive adequate care throughout their growing period.
Timing Considerations For Soil Preparation: Sterilizing Large Amounts of Soil
When considering soil preparation, it is important to determine the amount of soil that needs to be sterilized.
Depending on the size and type of planting project, different amounts of soil may need to be cleaned for a successful outcome.
The time required to properly sterilize the soil will also vary depending on what techniques are used.
The first step when preparing the soil is determining how much is needed for the project at hand. Knowing this information will help plan out how long it will take to have enough sterile soil ready for use.
It is also prudent to consider any other materials or tools necessary for completing the task as well. Having an adequate supply of these items can significantly reduce the time spent searching for them later.
Once all supplies have been acquired, they must be used promptly and efficiently so that the desired results can be achieved on time.
For example, if one wants to sterilize large quantities of soil quickly, then utilizing methods such as boiling water or steam cleaning might prove beneficial.
Conversely, smaller areas would require less intensive processes like sanding down roots or applying organic pesticide solutions over several weeks until complete coverage has been established.
No matter which method is chosen, proper timing plays a key role in ensuring success when prepping soils for planting projects.
Taking into account available resources along with specific objectives should lead to efficient decision-making regarding optimal strategies going forward.
Strategies For Water Conservation
An effective way to clean soil for planting is to heat it in the microwave. Boiled water can also be used by putting the soil inside a pot and boiling it on the stovetop.
This technique helps to kill any pathogens that may be present in the soil without damaging its chemical composition.
Soil can also be cleaned using plastic bags filled with hot, soapy water. The bags should then be shaken vigorously, after which the soil can be rinsed off with cold water before being placed into containers or pots for planting purposes.
Water conservation plays an important role when cultivating plants as well and there are several strategies available for reducing water usage during gardening activities.
One such strategy is grouping similar plants together based on their water requirements; this will help ensure that each plant receives only the amount of moisture needed.
Plus, mulching around trees and flower beds can reduce evaporation from soils and promote better retention of moisture while at the same time helping to suppress weed growth.
Finally, utilizing rainwater harvesting techniques such as collecting rainwater runoff from gutters and directing them towards gardens or decorative ponds allows gardeners to make use of natural sources of hydration instead of relying solely on tap water.
These steps all contribute to the efficient utilization of resources while maintaining optimal levels of hydration for healthy plant development.
Plant selection tips are essential when planning a successful garden project; understanding how different species interact with one another and their environment can help guide decisions about what varieties are suitable for specific locations.
Plant Selection Tips
Have you ever wondered how to sterilize your potting soil for planting?
Sterilizing the soil is an important step in ensuring that your plants will thrive and grow.
Learning how to properly sterilize your soil can save you a lot of time, energy, and money while setting up your garden or indoor plant display.
The temperature of the soil must reach 160 degrees Fahrenheit to effectively kill any bacteria or fungus present.
The most efficient way to do this is by using batches of soil that are placed inside an oven preheated at 200°F for about 30 minutes.
This process should be done with caution as it could cause fire hazards if not approached safely. For those who prefer not to use their home ovens, other methods include mixing a 1:9 ratio of bleach-water solution into the soil and letting it sit overnight before rinsing it out.
No matter which method you choose, make sure that all tools used during the process are cleaned thoroughly afterward so there isn’t any cross-contamination between batches of soil.
Furthermore, always remember to wear gloves when handling wet or damp soil, as raw materials may contain hazardous organisms such as E. coli or salmonella bacteria which can lead to serious health issues if exposed directly to the skin.
In short, taking the necessary steps to sterilize your potting soil can help keep both yourself and your plants safe from potential harm while giving them a clean environment where they can develop healthy roots without worrying about disease development due to poor hygiene practices.
Frequently Asked Questions
What Is The Best Way To Determine The Quality Of Soil?
One way to evaluate the quality of soil is through physical testing. This involves observing characteristics such as color, texture, structure, and odor.
Soil color may range from dark black or brownish-black (indicating high organic matter content) to light gray (suggestive of poor fertility).
Texture refers both to size and arrangement – large particles indicate a sandy composition whereas small ones indicate clayey soils; an even mixture indicates loamy soils which are best for most types of vegetation.
Structure largely depends on the degree of aggregation formed by soil particles due to their chemical properties – crumbly structures are more suitable than hard lumps or clods.
Lastly, the smell can give clues about nutrient availability: sweet smells typically mean higher concentrations while strong odors could signify contamination with hazardous compounds like petroleum products.
Laboratory analysis also plays an important role when assessing the quality of soils.
These tests measure elements such as pH levels, nitrogen availability, carbon concentration, salinity level, and other essential nutrients needed by crops during different stages of development.
For instance, certain vegetables need acidic conditions while others require neutral or alkaline environments; accordingly, adjusting pH levels will depend on what type of crop you intend to grow in your garden or farm field.
And, laboratory tests allow for determining if contaminants like heavy metals are present in the soil and whether corrective measures should be taken before proceeding with planting activities.
In summary, evaluating the quality of soils before cultivating requires careful consideration since many factors can influence plant health and productivity over time.
Physical testing enables understanding composition at a surface level whereas laboratory analyses provide deeper insights into nutrient availability and potential hazards lurking beneath the surface layer.
With these tools at hand, anyone interested in growing healthy vegetation has access to information that facilitates the decision-making process associated with managing agricultural projects successfully.
How Can I Tell If Soil Is Contaminated With Chemicals?
The most common method for detecting chemical contaminants in soil samples is a chemical analysis using laboratory equipment such as spectrometers and chromatographs.
The process involves collecting a sample from the intended area, then preparing it by drying, grinding, sieving, and extracting any volatile compounds that may be present.
Once prepared, the material is tested against known standards to identify potential contaminants. The results are usually presented as concentrations of specific elements or compounds found in the sample relative to natural levels in uncontaminated soils.
Then laboratory testing and other techniques can be used to detect possible sources of contamination.
Visual inspection can reveal signs of pollution such as discoloration or oil slicks on water surfaces near where sampling has taken place; similarly, changes in vegetation density compared with surrounding areas could indicate the presence of toxins or heavy metals.
Sampling methods such as core drilling and augering also provide information about subsurface layers which may have been affected by industrial runoff or spills over time.
When assessing potentially contaminated sites all available data points must be considered together – lab tests alone should not be relied upon when making decisions about remediation efforts because they don’t always capture every source of contamination present at a site.
Taking into account visual observations alongside laboratory results enables more informed decision-making and helps protect both crops and people from harm due to hazardous materials.
How Often Should Amendments Be Added To The Soil?
The frequency of amendment additions depends on many factors including soil type, climate conditions, and crop requirements.
For most soils, amendments should be added at least once every season before planting. For sandy soils that are prone to nutrient leaching, more frequent applications may be necessary to replenish lost nutrients.
Clayey soils, which tend to hold onto nutrients better than sandier soils, require less frequent amendment applications since they can retain the applied nutrients longer.
Plus, organic materials like peat moss have long-term effects on soil structure and usually only need to be amended annually or biannually depending on local conditions.
When deciding when and how often amendments should be added to your garden beds it’s best to consult local extension services or experienced farmers in the area who can offer advice tailored specifically to your needs.
By following their recommendations you will reap the benefits of improved water retention capacity, increased microbial activity in the soil, enhanced root development pathways, and higher yields from healthy plants!
What Is The Best Way To Balance Soil Ph Levels?
The pH level, or acidity-alkalinity balance, of a given soil will determine which nutrients are available to plants and how easily those nutrients can be accessed.
Understanding the basic chemistry of soil pH, as well as the best methods for adjusting it, can ensure that the right conditions exist for successful plant growth.
Soil’s pH level is measured on a scale from 0-14; values below 7 indicate acidic soils while values above 7 indicate alkaline soils. Most plants prefer slightly acidic soils with a pH between 5.5 and 6.5, though some species require more highly acidic soils to thrive.
Testing kits are widely available at garden centers and online retailers to measure your soil’s current pH level; when you know where your results lie on the spectrum, you can adjust accordingly with amendments such as sulfur or lime to increase or decrease acidity respectively.
It is also important to note that adding too much amendment material without taking into account other factors such as the type of soil (clay versus sandy) could cause further problems if not done correctly.
Besides, using organic materials like compost may take longer but provide better overall benefits than chemical solutions because they help build up naturally balanced ecosystems within the soil profile over time.
What Are The Advantages Of Composting Soil?
By breaking down organic matter into nutrient-rich humus, compost provides the essential nutrients necessary for healthy plant growth while improving the structure of the soil.
Again to these benefits, compost also helps improve water retention and aeration in the soil, reducing irrigation needs and allowing oxygen to reach deeper roots.
A major advantage of composting is that it is an environmentally friendly way to recycle otherwise wasted resources such as food scraps or yard trimmings.
These waste products are decomposed by bacteria and fungi over time into nutrient-rich material that can be used for fertilizing plants.
Composting also reduces landfill waste since fewer items need to be discarded from homes and businesses.
Furthermore, compost can be created with minimal effort using simple tools like a pitchfork or shovel; no special equipment is required.
The use of compost offers numerous other benefits beyond soil health: It prevents erosion on slopes and banks by providing a protective layer on topsoil; adds beneficial microorganisms to the environment which help suppress disease organisms; improves drought tolerance in plants; increases storage capacity for nitrogen and phosphorus naturally found in the soil; suppresses weed growth; and encourages earthworms which further enrich soil quality. All of these factors contribute to improved yields when compared to non-composted soils.
Overall, composting not only helps create richly fertile soils but also helps reduce the environmental impact associated with home/business waste disposal while enhancing sustainability efforts overall.
Summing Up
Soil quality is essential for successful planting and gardening. Regular soil testing can help ensure that the pH levels are balanced, as well as identify any contaminants in the soil.
Amendments such as compost or manure should be added regularly to maintain a healthy balance of nutrients.
Composting is an excellent way to create healthier soils, but it takes time and effort. The benefits of good soil health are many: plants will grow faster and stronger; they’ll absorb more water, reducing the need for irrigation; and overall yields will increase by up to 40%.
To make sure that your garden has healthy soil, regular maintenance is key. Testing once every two years will allow you to monitor changes in nutrient composition, while amendments should be added annually or even more often if necessary.
Finally, adding organic matter like compost can dramatically improve productivity in both vegetable gardens and flower beds alike.
Healthy soil isn’t just important for plants—it’s also vital for human life too!
It helps protect our environment from erosion and pollution, reduces dangerous runoff into lakes and rivers, stores carbon dioxide from the air, and prevents flooding during heavy rains – all this plus it provides food for us humans too!
So about keeping our planet healthy and productive, taking care of our soil is essential for everyone’s future well-being.

Leave a Reply