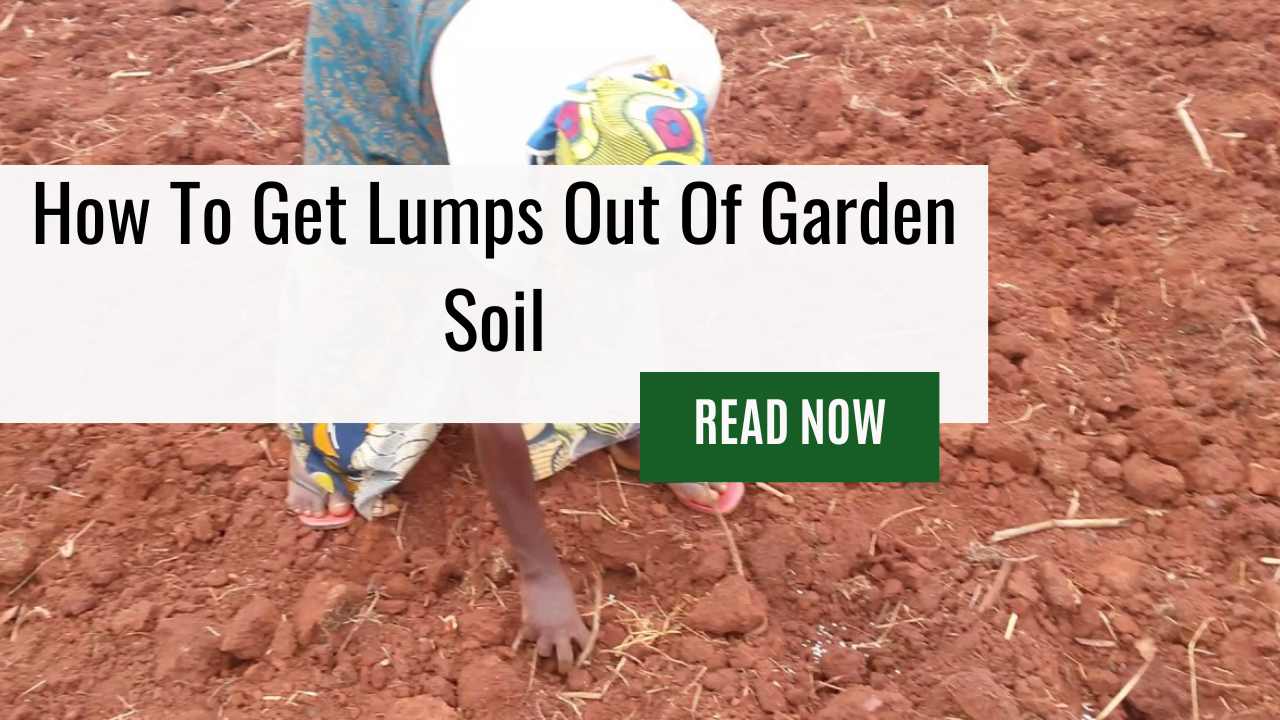
Do you have a garden that’s full of lumps?
It doesn’t take long for unsightly clumps to form in the soil when it’s not properly cared for. It can be frustrating, but don’t give up!
There are simple steps anyone can take to get rid of those lumps and restore their garden soil. In this article, we will guide you through how to get lumps out of your garden soil with ease.
Are you ready to level up your gardening game?
Let’s go over some basic tips and tricks on how to make sure your soil is smooth and lump-free so that your plants can thrive.
We’ll cover what causes lumps in the first place, which tools you need, and step-by-step instructions on exactly how to remove them from your garden space.
Whether you’re a novice or an expert gardener, these techniques will help you tackle any bumpy challenge with confidence.
By following our easy advice, you’ll soon have beautiful, even ground that looks like it belongs in a magazine spread! So roll up your sleeves – let’s break down how to get lumps out of garden soil in no time at all!
Common Causes Of Soil Lumps
Soil lumps can be caused by a variety of different things, but the most common culprits are organic matter and clay soil.
Organic matter such as leaves, mulch, and compost that hasn’t been fully broken down can clump together in your garden beds.
Clay soils naturally form lumpy aggregates due to their composition; when wet they come apart easily but dry out quickly once exposed to air forming solid lumps.
Double-digging is another potential cause of soil lumps since it disturbs the existing soil structure which can lead to compaction over time.
So if you’re dealing with lumpy soil in your garden beds then these are likely the causes you should consider first.
Fortunately, there are several methods for breaking up those pesky chunks of dirt so that your plants have plenty of room to build strong root systems and get all the nutrients they need.
Identifying And Removing Rocks And Stones
To start, it’s essential to identify the problem before trying to tackle it. Carefully examine the soil for any hard lumps or rocks that are rock-hard when touched.
Once identified, begin removing the top layer of soil around the area where the lump is located. This will make it easier to break apart stubborn rocks and stones without having to move too much dirt at once.
The next step is to loosen up the lump by working some elbow grease into it. Use a spade or shovel to chip away at larger pieces until they become loose enough to pick out by hand.
If necessary, use appropriate tools such as hammers or chisels to further break down pieces so they can be easily removed from your garden soil.
If you need more leverage, dig deeper than just the surface level of your soil and work smaller chunks out at a time until all of the lumps have been fully extracted.
By following these steps, you should be able to successfully rid your garden of pesky rocks and stones while maintaining its integrity intact.
Aerating The Soil
The process of aeration involves loosening the soil, which helps improve its structure and allows for better water absorption.
To do this, use a garden fork or tiller to dig up the area that needs aerating. Make sure you are digging deep enough so that it reaches at least 8 inches into the ground.
Once you have dug up the soil, mix in some organic material such as compost or mulch. This will help break down any large clumps that may be present and create air pockets within your soil.
Another method of aerating is using an aerator attachment on your lawn mower, if you have one available.
This device runs over your lawn and creates holes in the ground, allowing oxygen to reach deeper levels of soil and improving drainage.
If neither of these methods seem suitable for your situation then try sprinkling fine sand onto the affected areas – this should eventually break down any lumps in time.
Whatever method you choose, make sure to take care when working with your soil as it can quickly become compacted again if not handled properly.
Aerating regularly will ensure that your garden stays healthy and lump-free!
Adding Organic Matter
After aerating the soil, adding organic matter to it is essential to get rid of lumps. Adding organic material helps improve moisture retention and improves drainage as well.
To add organic matter to your garden soil, use materials such as composted manure, peat moss, leaf mold, or bark mulch.
When adding organic matter to the soil, be sure that it is wet enough for optimum absorption into the soil.
If you’re using dry materials like peat moss or shredded leaves, mix them with water first so they can form clumps easier when mixed with the soil.
It’s also important to note that if you’re using composted manure, do not apply too much; otherwise, it will cause an imbalance in nutrients which could negatively affect plant growth.
Once all of these steps have been taken care of and after allowing time for everything to settle properly in the soil structure, you should notice significant improvements when tilling the soil soon afterward.
Your garden should now be ready for planting!
Breaking Down Compacted Soil – Key Step of How to Get Lumps Out of Garden Soil
As for getting lumps out of garden soil, the key is breaking down any compaction.
First and foremost, a soil test should be done so you can determine which nutrients need to be added back in. Once this information is gathered, it’s time to start loosening up those clay particles.
One way to do this is by adding organic matter like compost or aged manure.
The amount applied will depend on how compacted your soil currently is; however, as a rule of thumb about two inches should be enough for most soils.
Make sure that whatever material you choose has been well-rotted before adding it into the mix – fresh materials could cause nutrient imbalances or lead to plant stress later down the line.
Other tools at your disposal are mechanical methods such as rototilling and hand troweling.
This approach works best when used in conjunction with organic amendments as they help hold moisture levels while also preventing erosion caused by wind or rainfall.
For really tough spots where even these techniques aren’t working, consider using an aerator or plugging machine to create deep channels within the soil itself.
Working through each layer one at a time until reaching desired results can take some patience but making small incremental changes over time will always yield better long-term results than trying to rush things along too quickly.
Once all these steps have been taken, check for any remaining lumps every few weeks and repeat the process if necessary.
Doing regular maintenance like adding additional compost when needed and keeping an eye out for signs of compaction will ensure that your garden stays healthy year after year!
Dealing With Clay-Based Soils
When dealing with clay-based soils, the challenge can be even greater due to their heavy composition. Clay soil tends to compact over time and makes it difficult for plants’ roots to penetrate.
To alleviate this problem, one must start by breaking down the hardened surface layer of the soil. This can be done through various methods such as aeration or tilling the soil.
The next step is to add organic matter to your garden’s clay-based soil to create a looser structure that will allow water and air circulation, while also providing nutrients for plant growth.
Adding composted manure, peat moss, or aged leaf litter are all great ways of creating a better-growing environment for your plants.
If you’re unsure about what type of material would work best for your garden, MSU Extension offers advice on how to customize your approach depending on the specific needs of your garden plot.
Finally, consider adding some gypsum (calcium sulfate) after incorporating organic matter into your gardening space.
Gypsum helps break apart dense particles within the soil so that both water and air can get around more easily.
It also increases calcium levels in acidic soils which encourages beneficial bacteria activity – essential for healthy root systems!
Applying Lime To Reduce Acidity In The Soil and Break Apart Clumps
Applying lime can help reduce the acidity of the soil, which will make those unsightly lumps easier to break apart.
It also helps to create a healthy lawn and improve drainage by allowing water and nutrients access to the roots of your plants.
To apply lime, simply spread wood chips over the surface of the soil. The wood chips should be evenly distributed and cover any bare patches on the ground.
They will act as an insulator to keep moisture from evaporating too quickly from the ground. Then add enough lime powder or pellets to ensure coverage on all parts of the soil surface.
This process may take up to several hours depending on how much area needs treating – but don’t worry, it’ll be worth it once everything is done!
Finally, after adding the necessary amount of lime powder or pellets, give them at least two weeks before watering your garden again.
Doing this ensures that all of the desired benefits are achieved without any adverse effects occurring due to overly-rapid absorption into the soil.
Once these steps have been taken, you can then enjoy having a lush green lawn with no more lumpy bumps in sight!
Using A Rototiller Or Cultivator To Break Up Clods Of Soil – Rototilling Like Boss!
Using a rototiller is the quickest way to get rid of large chunks of dirt and make small clods more manageable. Rototillers come in both gas-powered and electric models, so choose one that fits your needs.
When using the machine, move slowly over each area and make sure not to dig too deep into the ground – this could cause damage to root systems below the surface.
As you work with the tiller, turn off its power before lifting it from one spot to another; this will prevent soil particles from flying out and hitting nearby objects or people.
Cultivators are an ideal tool when tackling smaller patches of lumpy soil where a rototiller may be too powerful.
To use a cultivator, start by moving it back and forth across the affected area until all clods have been broken down into finer pieces.
Make sure not to go too far deep into the soil as this can disrupt plant roots underneath. After completing this procedure, rake away any remaining debris left behind by the cultivator.
Soil should now be ready for planting! Whether you decide on a rototiller or cultivator, these machines offer an efficient method of breaking apart tough clumps in your garden’s earth.
With consistent use, they’ll keep your yard looking great all year round!
Covering The Area With Mulch Or Compost
Take Jack, for example. He had been trying to get rid of lumps in his garden soil and was getting frustrated with the lack of progress.
After doing some research, he found that covering the area with mulch or compost at least two inches deep would help break up the soil and make it easier to work with.
Jack decided to go ahead with this method and it worked! Before long, he could see improvements in his garden soil’s texture – no more hard lumps or clods.
Instead, his plants began to thrive as they were able to access water and nutrients much better than before.
The mulch or compost also helped retain moisture around the plant roots which kept them hydrated during hot summer days when rainfall was scarce.
The addition of mulch or compost not only improved Jack’s garden soil but also reduced weed growth since fewer weeds could germinate due to lower light levels on the surface layer.
It also provided a protective barrier against erosion from wind or rainwater. All these benefits made Jack realize that investing a little time and effort into covering his area with mulch or compost was worth it!
Watering The Garden Bed Properly
Now that the garden bed has been covered with mulch or compost, it’s time to water the soil properly. To ensure this is done correctly, start by removing the top layer of soil and loosening any lumps found within.
This will help promote healthy root growth and allow for proper drainage. It’s also important to make sure not to overwater your plants; too much moisture can lead to rot and other diseases in both foliage and roots.
The key here is moderation – watering enough to keep a consistent level of moisture but not so much such that you risk drowning the plant’s roots.
Before each irrigation cycle, check how dry the soil is at least two inches below the surface using a trowel or similar tool; do not rely solely on what you see on top.
Doing this regularly will prevent over-watering while still providing sufficient hydration for the optimal health of your plants.
By following these steps when watering your garden bed properly, you’ll be able to get rid of any lumps in the soil before planting begins and ensure good drainage for optimum plant health.
Regularly Raking The Area To Loosen Compacted Areas
Raking the area regularly not only helps break up clumps and lumps in the soil but also helps aerate it, promote drainage, and improve nutrient uptake for plants growing in the garden.
It’s important to use a light touch when raking so you don’t inadvertently damage delicate root systems or cause compaction elsewhere in your beds.
Start at one end of your garden bed and make overlapping passes across it until you reach the other side; this ensures thorough coverage while preventing large chunks of soil from being moved around too much.
Finally, rake away debris such as stones, leaves, and any weeds that could impede further growth in your plot. Doing this consistently will help ensure that your garden remains lush and healthy all year round!
Letting Earthworms Do Their Job – Nature’s Best Lawn Care Professionals!
Now that you have regularly raked the area to loosen compacted areas, it is time to let earthworms do their job.
As they tunnel through the ground, they create tiny channels that allow water and air to penetrate more easily into the inches of soil below them.
This helps promote healthy growth for both plants and grass in a much faster manner than if you were trying to rake out the lumps yourself.
Earthworms also feed on organic matter, like dead leaves and stem, as well as decaying roots from old trees which adds nutrients back into the soil in an all-natural way.
Not only does this replenish essential minerals needed for plant life but it also adds beneficial bacteria and fungi which enhances microbial activity within the topsoil ecosystem.
By allowing these organisms to fertilize your garden organically, you won’t need any chemical additives or synthetic fertilizers that could harm the health of your garden over time.
It’s important to note though that while earthworms can improve overall drainage by creating those little tunnels throughout your yard’s foundation – they might not necessarily be able to remove large chunks of soil or stubborn clods of dirt no matter how hard they try!
So keep this in mind when dealing with especially lumpy soils since you might need a bit more elbow grease then just relying on our friendly worms alone.
Adding A Fertilizer For Nutrient Deficiencies
When dealing with lumpy soil in your lawn or flower bed, adding fertilizer can help address nutrient deficiencies and create a healthier environment for plants.
Fertilizers are available in a variety of forms – liquid, granular, slow-release, and organic – so you’ll want to select the one that best fits your needs.
Liquid fertilizers provide quick nutritional benefits while granular ones tend to be less expensive but take longer to become effective.
Slow-release fertilizers are great for long-term growth; however, they’re more expensive.
Organic fertilizers are made from natural sources like composted manure or bone meal and provide essential nutrients over an extended period.
Once you’ve determined which type of fertilizer is right for your garden, consider the amount needed to cover the affected area.
If it’s only a small section of lawn that has lumps, then start off with a lower dosage than what is recommended on the packaging instructions – typically 1/4 cup per 10 square feet should do the trick.
For larger areas, you may need up to 3 cups per 100 square feet. It’s always better to err on the side of caution when applying any type of chemical fertilizer as too much could damage or even kill your plants!
Be sure to spread the fertilizer evenly throughout the soil using either a hand-held spreader or by sprinkling it directly onto each plant individually.
After application, water thoroughly and allow the fertilizer for at least 24 hours before mowing your lawn or planting new flowers into flower beds.
With regular applications according to the manufacturer’s guidelines, you will soon have lush green grass and abundant blooms in no time!
Performing A Ph Test For Accurate Results
Measuring the pH of your garden soil is like peering into a murky pool, letting you see what lies beneath.
It’s important to test your soil with an accurate pH meter before adding any new soil or planting anything in it – this way, you can make sure that it’s at its optimum level for whatever type of plants you have in mind.
Testing doesn’t take long and is fairly easy: just grab some samples from different parts of the garden and mix them together, then add distilled water until damp.
Once mixed, place each sample onto separate strips of litmus paper – these will give you a color-coded reading so you’ll know whether the acidity levels are suitable for the plants you want to grow.
If your results show that the pH is too low or too high, don’t worry; there are plenty of ways to adjust it. Adding lime if it’s too acidic raises the pH, whilst using sulfur lowers it if it’s too alkaline.
You may also need to replenish essential minerals such as nitrogen, phosphorus and potassium which could be lacking due to years of tilling and overfertilizing – simply use compost or manure undiluted with new soil when planting out or laying turf.
By testing your garden soil regularly, not only do you ensure that lumpy patches get sorted but more importantly, all future growth remains healthy and happy!
Frequently Asked Questions
How Often Should I Water My Garden Bed?
About determining how often you should water your garden bed, there are a few factors to consider. First off, the type of soil plays an important role in deciding when and how much water to give your plants.
For example, sandy soils will require more frequent irrigation than clay-based soils because they tend to dry out faster.
Also, certain types of plants may need more or less water depending on their specific requirements.
The amount of sun exposure also affects how frequently you should be watering your garden bed. If the area gets a lot of direct sunlight throughout the day, then more frequent irrigation may be necessary.
However, if your garden is shaded most of the time, then you might not need to irrigate as often since the soil won’t dry out as quickly.
Lastly, understanding local weather patterns can help inform when and how often you need to water your garden bed – especially during periods with little rainfall or extreme heat waves.
These are all things that play into figuring out exactly how often one should be watering their garden bed to get optimal growth from their plants.
Taking into account these different elements can help ensure that you’re providing just enough moisture for each plant’s particular needs while avoiding over-watering which could lead to root rot or other issues with soil health.
Ultimately, striking a balance between proper hydration and allowing adequate drying time for the roots is key for happy and healthy plants!
Will Adding A Fertilizer Help With Soil Lumps?
If you’re dealing with lumpy garden soil, it’s worth considering whether or not adding in some extra nutrients would be beneficial.
Fertilizers can often help to break down clumpy soils, encouraging smoother and healthier growth for your plants.
It’s important to first assess what kind of soil you have to determine which type of fertilizer would work best for improving the texture.
Different types of fertilizers contain different elements that could potentially benefit your soil composition; for example, organic materials like composted manure may be able to provide additional essential nutrients while also helping the soil retain moisture more efficiently.
Before applying any fertilizer product, make sure to read up on how much should be used and how often it needs to be applied – too little won’t do anything but too much can cause burning and other damage to your plants.
With the right amount of care and attention, fertilizing your garden beds could end up being an effective way of getting rid of those pesky lumps!
How Do I Know If My Soil Is Too Acidic?
The pH level of your soil will give you an indication: acidity levels range from 0-14 on the pH scale, with 7 being neutral and anything above that alkaline and below acidic.
Test kits are widely available and relatively inexpensive, allowing you to easily check the acidity level yourself at home. If the results come back as 6 or lower then your soil is likely too acidic for most plants.
It’s worth noting though that different plants have their preferences in terms of pH levels; some prefer more acidic soils than others.
You’ll need to research which type of plant you’re growing before looking into balancing out the acidity in your soil. That way, you won’t run the risk of making any drastic changes that could end up damaging them instead!
By understanding what kind of conditions each plant likes best and regularly testing the acidity levels in your soil, you can ensure that your plants get all they need to thrive while avoiding lumps in your garden beds.
Is There A Way To Prevent Soil Lumps From Forming?
The first step is to examine what’s causing lumps in the first place. Generally speaking, environmental factors like temperature and moisture levels can affect how easily soil clumps together.
If your climate fluctuates drastically throughout the year, then chances are high that soil will form into clods more often than not.
Another factor to consider is drainage; if water doesn’t drain properly away from your plants’ roots, then it may cause them to be overwatered or rot due to a lack of oxygenation.
To avoid these issues, make sure you use proper irrigation techniques like drip systems or soaker hoses when watering your plants.
Besides, ensuring good aeration with tools like tines or forks can help reduce compaction and keep soils loose and airy – both important steps toward preventing lump formation.
Finally, adding organic matter such as compost or manure can also improve soil structure over time and make it less likely for lumps to form.
By regularly incorporating these materials into the topsoil layer around your plants, you’ll provide nutrients as well as improved texture which should result in a healthier garden overall!
So whether it’s through careful irrigation practices or regular additions of organic material, following these simple tips should go a long way towards preventing unsightly chunks of dirt from marring your beautiful garden beds!
Can I Use A Rototiller On Clay-Based Soils?
First off, certain factors need to be considered before using a rototiller on clay-based soils.
If your garden bed has been compacted by previous tillage or construction activities, then it’s best to avoid using a tiller altogether as this could further compact the soil.
However, if it’s just naturally occurring clumps in the soil from rainfall or heavy winds then it might be possible to use a rototiller depending on the type of clay present.
When attempting to rotate clay-based soils, it’s important to have an appropriate machine for the job. A standard rototiller won’t cut through dense layers of clay because of its inability to generate enough power and torque.
Instead, you’ll need something like a ‘subsoiler’, which is designed specifically for heavily compacted ground like clay-based soils.
Subsoilers consist of several sets of blades that penetrate deep into hard-packed earth and break up any lumps or chunks along the way – perfect for getting rid of those pesky lumps!
So while tackling lumpy clay-based soil can seem challenging at first, having an appropriately powerful tilling machine is essential if you want to get good results.
The right tools will ensure that your garden beds remain free from lumps and evenly cultivated going forward – giving you healthier plants and bigger yields over time!
Summing Up
Regarding getting lumps out of garden soil, it’s important to take a holistic approach.
By understanding the type of soil you have and how often it needs watering, as well as what kind of fertilizer and tools are appropriate, you can get your bed ready for planting in no time.
Watering regularly is the best way to prevent soil from forming into hard clods that need breaking up with a shovel or rototiller.
Adding organic material like compost will also help keep the structure loose and airy – just like a sponge absorbing water.
Fertilizers can be used judiciously if needed, but remember that too many nitrogen-rich fertilizers can cause acidic soils which hinder plant growth.
Overall, treating your garden bed right is essential for successful gardening. It’s like tending an orchestra; each instrument needs its care and attention so they all come together beautifully.
With patience and good practice, you’ll soon have healthy soil with perfectly pliable particles ready for whatever seeds you choose!

Leave a Reply