Are you a plant enthusiast looking to expand your collection with an easy-to-care-for yet stylish addition?
Look no further than the snake plant.
Also known as ‘mother-in-law’s tongue,’ this hardy species is perfect for those who want to add greenery to their home but don’t have a lot of time or expertise to dedicate to gardening.
Plus, they come in various sizes and colors, making them a versatile choice for any space.
If you already own a snake plant but are ready to give it some extra TLC, one way to do so is by transplanting it into a new pot.
Transplanting allows the roots of the plant to spread out more comfortably, leading to healthier growth and overall well-being.
Whether you’re new to gardening or simply need some guidance on how to properly transplant your beloved snake plant, this article will provide step-by-step instructions so that you can master the art of replanting like a pro.
Signs That Your Snake Plant Needs Transplanting
As the old adage goes, ‘out of sight, out of mind.’ Unfortunately, this is often true about plant care.
We may water our plants regularly and place them in a sunny spot, but forget about their roots which are crucial for their overall health.
This is especially important with snake plants because they can become root-bound over time. So how do you know if your snake plant needs repotting or transplanting?
One sign that your snake plant needs attention is if its leaves begin to droop or turn yellow despite adequate watering and sunlight.
Another indication is if the soil appears compacted and doesn’t absorb water as well as it used to.
If you notice these symptoms, it’s probably time to consider transplanting your snake plant into fresh soil where it can continue to thrive.
But before we dive into the process of transplanting, let’s first discuss choosing the right time to do so.
Choosing The Right Time To Transplant – See Whether It’s Needed to Repot a Snake Plant First
If you’ve noticed that your snake plant needs repotting, now it’s time to learn how to transplant it. The next step is choosing the right time to do so.
Before you start digging up your beloved plant, make sure you pick the perfect moment for its relocation.
The best time to transplant a snake plant is in spring or summer when the growth cycle has just started. This will allow the roots to settle and adapt easily to their new environment.
However, if you notice any signs of distress on your plant such as wilting leaves or yellowing foliage, don’t hesitate to repot even if it’s not during the recommended season.
Remember that transplanting can be stressful for plants, so it’s important to minimize stressors by selecting an appropriate time to perform this task.
Selecting The Right Pot For Your Snake Plant
First things first: size matters. In terms of choosing a pot for your snake plant, bigger isn’t always better.
In fact, if you opt for a container that’s too large, your plant may become waterlogged or struggle to establish its roots in soil that’s overly moist.
On the other hand, if you choose a pot that’s too small, your snake plant may become root-bound and suffer from stunted growth.
So how do you strike the perfect balance?
Look for a container that allows enough room for your snake plant to grow over time (about 1-2 inches wider than the current container), while also ensuring adequate drainage holes at the bottom of the pot to prevent excess moisture buildup.
With these factors in mind, you’re ready to move onto preparing their new home with an equally important step – creating the perfect potting mix.
Preparing The Potting Mix To Repot Snake Plant For Transplantation
Now that you’ve decided to repot your snake plant, it’s important to choose the appropriate potting mix.
Snake plants thrive in well-draining soil, which means they need a mixture of organic matter and coarse materials like sand or perlite.
The best soil for snake plants is one that has good drainage and allows airflow around the roots. Avoid using heavy soils like clay as this can retain too much moisture, leading to root rot.
When choosing a potting mix for your snake plant, make sure to opt for a commercial blend designed specifically for succulents or cacti.
These mixes usually contain peat moss, perlite, and vermiculite – all materials that will help improve soil drainage while also retaining adequate moisture levels.
You may also want to add some extra perlite or sand to the mix if you have particularly heavy soil in your garden.
With the right potting mix, your snake plant will be able to grow strong and healthy after transplanting.
To ensure the successful transplantation of your snake plant, it’s important to prepare it thoroughly before moving on with the process.
This includes properly watering your plant beforehand so that it doesn’t go into shock during repotting.
In the next section, we’ll discuss how to water your snake plant effectively without overdoing it.
Watering Your Snake Plant Before Transplanting – How Snake Plant Care Makes All the Difference!
But before we dive into the guide to repotting snake plants, let’s talk about one important step that can make all the difference: watering your snake plant before transplanting.
Yes, I know what you’re thinking. ‘Water my plant? Before transplanting it?’ It may seem counterintuitive at first, but trust me on this one.
Giving your snake plant a good drink of water prior to repotting helps loosen up the roots and makes them easier to work with.
Plus, it ensures that your plant is well-hydrated during the stressful process of being transplanted.
So grab a watering can (or hose, if you’re feeling fancy) and give your little green friend some love before moving on to the next step of this adventure in snake plant care.
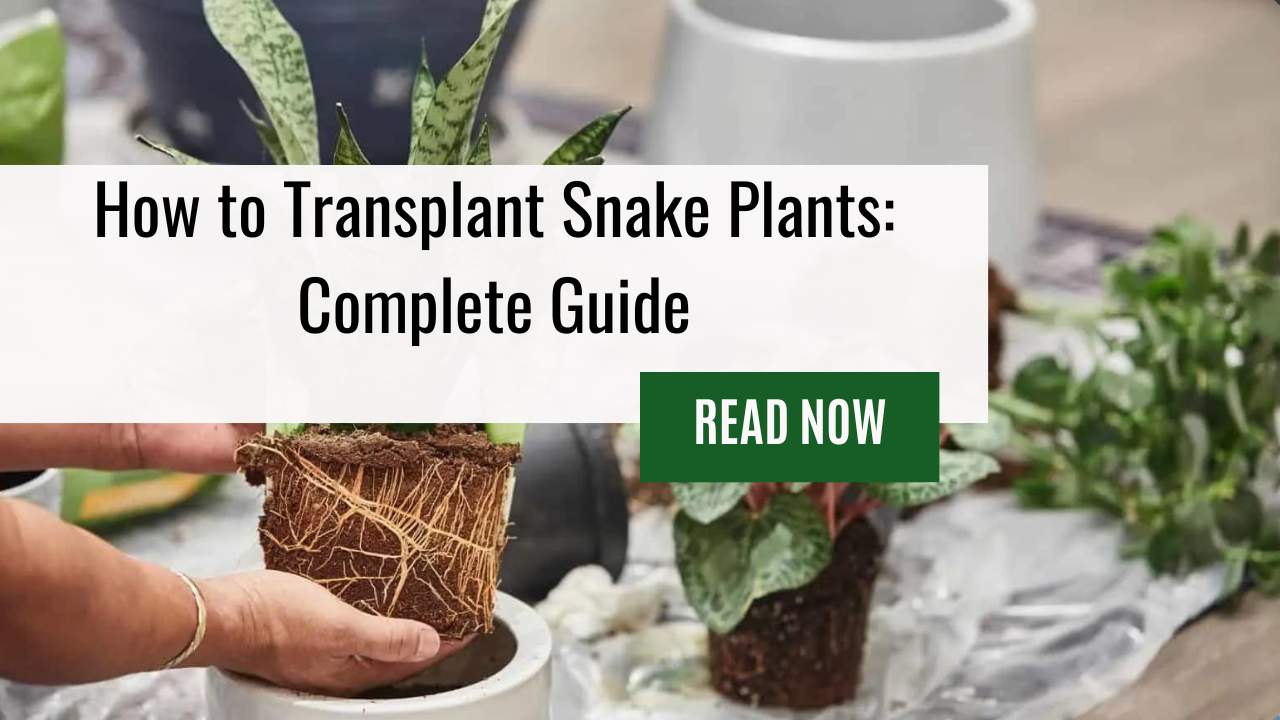
Removing the Plant From Its Current Container – Snake Plant Repotting Done Right!
After watering your snake plant, the next step is to remove it from its current pot.
First, gently tilt and rotate the pot to loosen the soil around the edges. If necessary, use a small trowel or knife to carefully separate any roots that may be clinging to the sides of the container.
Once you have loosened the soil all around the perimeter of the pot, grasp the base of the stem with one hand and turn the pot upside down into your other hand.
As you remove the plant from its current container, take care not to damage any leaves or stems. You can tap lightly on the bottom of the pot if needed to help release it from any remaining soil.
Once free, inspect both the root ball and current pot for signs of disease or pests. A healthy snake plant should have white or light brown roots that are firm and plump to the touch.
Any dark-colored or soft roots should be trimmed away before repotting in fresh soil.
Inspecting The Roots
Inspecting the Roots: Uncovering the Secrets of Your Snake Plant’s Health
If you’re looking to repot your snake plant or transplant a snake plant to a new location, inspecting the roots is an essential step in ensuring its success.
Think of it as peeling back the curtains on your beloved houseplant’s health – and boy, can those roots tell a story!
The first thing you’ll want to do is gently remove the plant from its current container, taking care not to damage any leaves or stems in the process. Once removed, take a good look at what lies beneath.
Inspecting the roots will give you insight into how well your snake plant has been cared for up until this point.
Healthy roots should be firm and white with no signs of rotting or damage. If you notice any brown or mushy spots, carefully trim them away with clean pruning shears before proceeding to repot.
Remember that using well-draining soil when repotting your snake plant is crucial for preventing root rot and promoting healthy growth.
Now that we’ve covered inspecting the roots, let’s move onto another important aspect of snake plant care: pruning those roots!
Pruning The Roots
After inspecting the roots of your snake plant, it’s time to move on to the next step in repotting: pruning.
Pruning is an important part of transplanting a snake plant as it helps ensure that only healthy and strong roots are left behind for optimal growth.
You’ll want to start by removing any dead or damaged roots using sharp, clean scissors or shears.
Next, take a look at the remaining root system and trim back any long, straggly roots. This will encourage new growth from the base of the plant and keep your snake plant looking neat and tidy.
Remember not to over prune – you want to leave enough healthy roots intact so that your plant can thrive in its new pot.
Once you’ve finished pruning, you’re ready to move on to placing your snake plant in its new home!
When it comes time to place your snake plant in the new pot, make sure you choose a container that is just slightly larger than its current one.
Snake plants prefer being snug in their pots rather than having too much room to grow freely.
Fill the bottom of the new pot with fresh soil before carefully positioning your snake plant inside. Make sure it sits at the same depth as before and add more soil around the sides until it’s firmly rooted in place.
Finally, give your newly transplanted snake plant a good drink of water, and sit back and watch it flourish!
Placing Your Snake Plant In The New Pot
Did you know that transplanting a snake plant can actually improve its growth and overall health?
In fact, repotting your snake plant every 2-3 years is recommended to prevent the roots from becoming too crowded and to refresh the soil.
If you’re ready to give your snake plant some new digs, follow these simple steps for placing your snake plant in the new pot.
First, choose a new pot that’s slightly larger than the current one. Make sure it has drainage holes at the bottom to allow excess water to escape.
Then, fill the bottom of the pot with fresh potting mix until it reaches about one-third of the way up.
Gently remove your snake plant from its old pot by carefully loosening any tangled roots and shaking off excess soil.
Place it in the center of the new pot and add more soil around it until it reaches just below the rim of the pot.
Adding The Potting Mix – Time to Repot Your Snake Plant!
Now that you have carefully removed your snake plant from its old pot and trimmed any dead roots, it’s time to add the potting mix.
The type of soil you use is crucial as this will provide the necessary nutrients for your plant to grow healthy and strong.
For a successful repotting process, we recommend using well-draining potting soil specifically made for succulent plants.
When adding the new potting mix, make sure to fill in any gaps between the root ball and the sides of the new pot. Gently press down on the soil around the base of your plant to remove any air pockets.
Keep in mind that snake plants don’t require much water or fertilizer, so be careful not to overdo it. Now that you’ve added fresh soil to your newly transplanted snake plant, it’s time to move on to watering!
Watering Your Newly Transplanted Snake Plant
You’ve finally repotted your snake plant, and now it’s time to give it the love and care it deserves.
But before you break out the watering can, remember that a newly transplanted snake plant needs some time to adjust to its new home.
Just like a newborn baby needs gentle care, so too does your snake plant after being uprooted from its old pot.
One of the most important things to keep in mind when caring for your newly transplanted snake plant is proper drainage.
Make sure there are enough drainage holes in the bottom of the pot to allow excess water to escape. Too much water around the roots can lead to root rot or other issues down the line.
Once you’re certain that your pot has adequate drainage, it’s time to start watering your newly transplanted snake plant!
Caring For Your Snake Plant After Transplanting
Now that you’ve successfully repotted your snake plant, it’s time to focus on the care needed for your newly transplanted plant.
Proper plant care is vital after transplanting to ensure that your snake plant thrives in its new environment.
One essential aspect of snake plant care after repotting is watering.
Water your newly transplanted snake plant sparingly during the first few weeks to prevent overwatering and root rot. Check the soil moisture level by sticking a finger into the soil about an inch deep.
If the soil feels dry, water thoroughly until excess water drains out of the bottom holes.
However, if the soil still feels moist, hold off on watering for a couple more days before checking again. Remember, overwatering can be detrimental to your snake plant’s health and growth.
With proper maintenance and attention, your freshly transplanted snake plant will continue to thrive and grow beautifully!
Frequently Asked Questions
How Long Will It Take For My Snake Plant To Adjust To Its New Pot After Transplanting?
You might be worried about how long it will take for your snake plant to adjust to its new pot after transplanting. But don’t worry, because, with a little patience and care, your plant will thrive in no time!
Snake plants are resilient and adaptable, so they can handle the stress of transplantation quite well.
Depending on the size of the plant and the conditions in which it’s placed, it may take a few weeks or even a couple of months before you see signs of growth and recovery.
However, if you make sure that your plant has adequate light, water, nutrients, and space to grow, it won’t be long before you notice some fresh leaves emerging from its roots.
With proper care and attention, you’ll soon have a happy and healthy snake plant that adds beauty and life to any room!
Can I Use Regular Garden Soil Instead Of Potting Mix For My Snake Plant?
Yes, you can use regular garden soil for your snake plant!
However, it’s important to note that potting mix is specifically formulated to provide the right drainage and aeration for potted plants.
Regular garden soil may not drain properly in a confined space like a pot, leading to root rot or other issues.
If you do decide to use garden soil, make sure to amend it with sand or perlite to improve drainage.
Remember, taking care of plants requires some experimentation and finding what works best for your specific situation.
With practice and observation, you’ll become an expert at caring for all kinds of plants – including your beloved snake plant!
Is It Okay To Divide My Snake Plant When Transplanting It Into A New Pot?
Yes, it is absolutely okay to divide your snake plant when transplanting it into a new pot!
In fact, dividing the plant can be beneficial for its growth and overall health.
This process involves separating the root ball of the plant into smaller sections and replanting them individually in separate pots. Just make sure each section has enough roots and foliage to sustain itself.
Dividing your snake plant can also help control its size if it’s outgrowing its current pot. So go ahead and give it a try – you’ll feel like a pro gardener in no time!
How Often Should I Water My Snake Plant After Transplanting?
Oh, you’ve successfully transplanted your snake plant! Congratulations!
Now comes the part where many people get stumped: how often should this little guy be watered?
Well, here’s a fun fact for you – snake plants are actually quite resilient and can go without water for extended periods of time. In fact, overwatering is more likely to harm your plant than underwatering it.
As a general rule of thumb, wait until the soil is completely dry before watering again. This could range from once every two weeks to once a month depending on factors like humidity levels and pot size.
Trust yourself, you got this!
Can I Fertilize My Snake Plant Immediately After Transplanting, Or Should I Wait?
The answer is that it’s best to hold off for at least a few weeks. While adding fertilizer can seem like a good idea, doing so too soon could actually harm the plant and slow down its growth.
After transplanting, your snake plant needs some time to adjust to its new environment and establish roots in the fresh soil.
Once it has settled in and started growing again, then you can think about boosting its nutrition with an appropriate fertilizer.
Just be sure not to overdo it! As always, moderation is key when caring for these hardy plants.
Summing Up
So, there you have it. All the information you need to successfully transplant your snake plant into a new pot.
But let’s be real, we all know how this is going to go. You’ll carefully transfer your beloved green friend into its fancy new home with high hopes and grand expectations.
But as the days pass, you’ll start to notice some wilting leaves and an overall lack of vitality.
And then it hits you – maybe plants don’t like being uprooted from their comfortable homes just like humans do.
Oh well, at least you tried. Maybe stick to buying already potted plants next time?


Leave a Reply