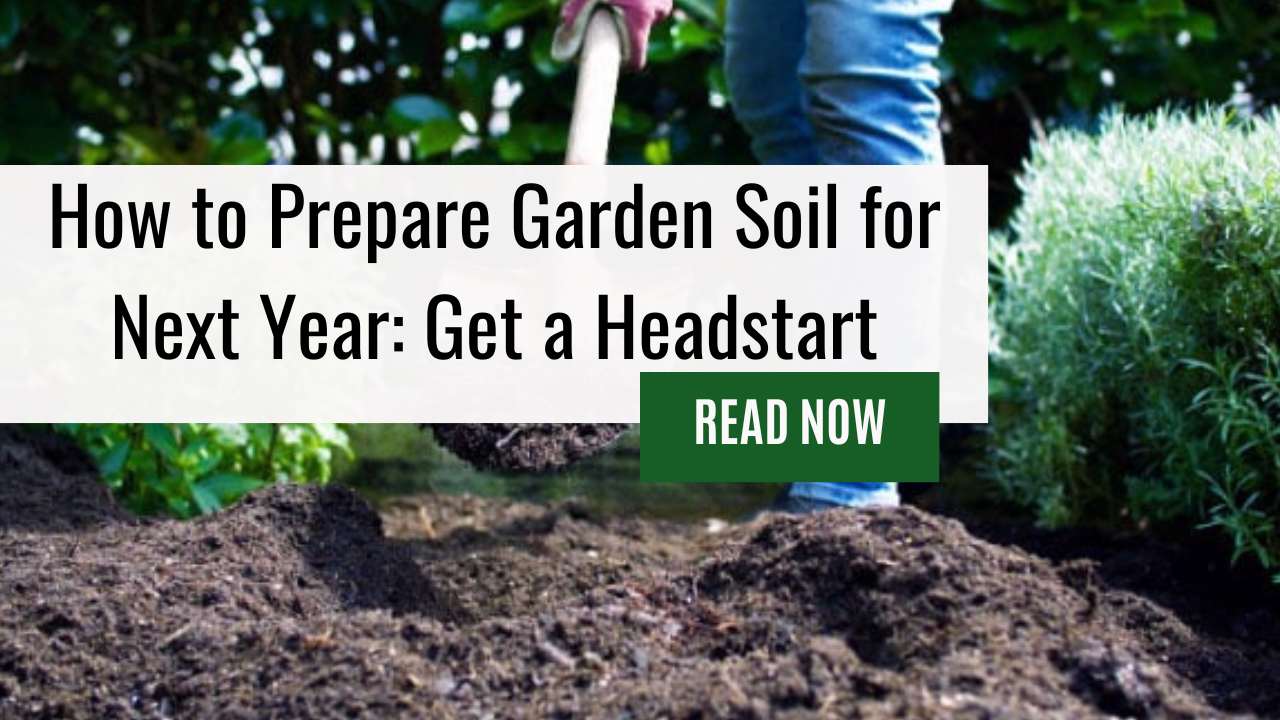
Are you ready to give your garden a head start for next year?
Preparing the soil in advance can make all the difference in growing healthy plants. But where do you begin?
Don’t worry, we’ve got you covered! In this article, we’ll show you how to prepare your garden soil for next year so that you can achieve gardening success with ease.
Whether you’re a seasoned gardener or just starting out, there’s no denying that having fertile and nutrient-rich soil is essential for optimal growth.
With careful preparation and attention to detail, your garden will be well on its way to producing flowers and vegetables of top quality.
We’ll take a look at what goes into preparing your soil, from proper testing and analysis to choosing the right materials and ensuring proper drainage.
By following these steps, you’ll have an effective plan tailored specifically to your garden’s needs so that it can reach its full potential come springtime.
So let’s get started – read on to discover how easy it is to prepare your soil for next season!
Analyzing Soil Composition – A Crucial Step on How to Prepare Graden Soil for Next Year
Knowing the soil’s ph levels, organic matter content, and nutrient availability are all important factors for having healthy plants and abundant harvests.
To determine these key elements of your soil, you’ll need to conduct a soil test.
A soil test will tell you what nutrients are present in the ground and how acidic or alkaline (or neutral) the pH level is.
The results can also provide insight into whether additional amendments such as lime or sulfur may be necessary to adjust the acidity or alkalinity of your soil.
Moreover, knowing the amount of organic matter in your dirt will give you an idea about its fertility and ability to retain moisture.
Accurately assessing these components of your garden’s landscape gives you the power to make informed decisions that will ensure optimal growing conditions throughout the season – giving you beautiful blooms and delicious fruits & veggies!
With this data at hand, you’re ready to move on to testing pH levels…
Testing Soil Ph Levels
Now it’s time to test the pH levels. This will help determine whether or not the nutrient composition of your soil is suitable for growing and nurturing plants.
It’s important to do a soil test every year as seasonal changes can affect the pH balance of your soil.
Testing your soil’s acidity/alkalinity levels (pH level) helps inform if amendments are necessary to make sure everything grows healthy and strong.
A simple home kit with litmus paper, which changes color based on the pH level of your sample, can be used to check the pH levels of your garden bed.
Generally, most vegetables prefer an acidic environment with a range between 6-7 on the 1-14 scale; however, some crops thrive better in more alkaline soils around 7-8.
If you find that it isn’t at an ideal pH level, then you can adjust accordingly by adding organic material to your soil such as peat moss or limestone powder. Peat moss helps lower pH while lime increases it.
Adding organic matter like compost also supplies beneficial microbes and other microorganisms into the mix which helps fix nitrogen from the air into a usable form for plant growth.
Composting takes time so planning ahead when preparing for next season is key!
By taking these steps now, you’ll have a healthier garden come springtime and avoid any nasty surprises once it comes time to start planting again!
Adding Organic Matter – Time to Prepare the Soil for Spring Planting by Adding Compost or Aged Manure!
Preparing your garden soil for the upcoming year is a critical step to ensure that it’s healthy and productive. Adding organic matter should be at the top of your list when prepping your plot.
Organic material helps improve drainage, increases fertility, and adds essential nutrients needed by plants to thrive.
Start by adding compost or aged manure to your soil in early spring before you start planting. This will give the organic matter time to break down into smaller pieces so they can mix more easily with the soil particles.
If possible, try turning over some of the existing soil first as this will help integrate any added fertilizers deeper into the ground more quickly.
You may also want to consider spreading winter rye, which is an excellent source of nitrogen that works well on heavier soils.
The roots left behind after harvesting provide beneficial air spaces allowing water and oxygen to penetrate through the earth easier.
In terms of working organically-rich materials into your dirt, there are many options available depending on what supplies you have access to.
Compost piles are ideal since they allow you to turn yard waste and kitchen scraps into usable fertilizer while keeping landfills free from unnecessary garbage build-up.
Creating a compost pile requires preparation but provides multiple benefits both now and throughout future growing seasons.
Creating A Compost Pile – Getting Ready for the Growing Season
It may seem like an arduous task now, but come next year you’ll thank yourself for all the effort!
To get started, make sure to add compost and other organic materials such as leaves, grass clippings, vegetable peels, and fruit rinds.
Pile these items up in an easily accessible corner of your garden and sprinkle some water over them from time to time so that they stay moist yet not soggy.
You’ll soon find out how beneficial having your own compost pile will be: Adding this natural fertilizer directly into the soil helps retain moisture while feeding both plants and microorganisms.
Plus, it reduces waste going into landfills—it’s a win-win! With just this one small step is taken care of, you can move on to amending sandy soils for optimum growing conditions ahead of next year’s planting season.
Amending Sandy Soils – Planting Cover Crops!
Now that your compost pile is established, it’s time to look at another soil amendment for sandy soils.
Sandy soils have a tendency to dry out quickly and lack essential nutrients. To help build up the nutrient content of these types of soil, you’ll want to add organic matter such as peat moss or composted manure.
You can also plant cover crops like clover or winter rye which will help replenish nitrogen levels when they are plowed back into the ground after harvest season.
To give your garden an extra boost before planting in the spring, mix a layer of compost with the top few inches of soil.
This will increase water retention and improve drainage while adding valuable minerals and other micronutrients.
If you’re looking for additional ways to improve fertility, consider using slow-release fertilizers specifically designed for sandy soils as well as rock dust or seaweed extracts which provide trace elements necessary for healthy plants and vegetables.
By applying these amendments throughout the year – not just during planting season – you’ll be able to ensure your garden has all the nutrients it needs for successful growth.
As you continue on this journey towards mastering gardening techniques, read on about how to amend clay soils next!
Amending Clay Soils
If you’re looking to prepare your garden soil for next year, there are some important steps to take- starting with amending clay soils.
Clay soils can be difficult and unappealing to work with due to their dense nature; however, they can become quite fertile when amended correctly.
Firstly, it is essential that organic matter is added to the soil in order to increase its fertility.
This will help create a better environment for plants by increasing water absorption and creating air pockets that allow roots to better access nutrients and oxygen.
You can add organic material such as compost or manure directly onto the soil prior to tilling it in. And, adding lime or sulfur may also help adjust pH levels in the clay soil if necessary.
Secondly, consider using soil amendments such as peat moss, vermiculite, or perlite during the process of amending clay soils.
These materials not only provide additional aeration but also act as buffers and stabilizers for phosphorus and other micronutrients needed for healthy plant growth.
Make sure these soil amendments are thoroughly mixed throughout the entire bed before planting anything next season.
With these tips in mind, you should have no trouble improving your clay soil this offseason so you can get growing again come springtime! Now let’s move on to breaking up hardpan…
Breaking Up Hardpan
Now that you’ve amended your clay soil, it’s time to break up any hardpan and get ready for next year’s garden.
Hardpan is a compacted layer of dirt at the bottom of the soil that can prevent water from draining properly. To break it up, you’ll need to use either a rototiller or a spade fork.
With a rototiller, dig down about 6 inches into the soil and pull back on the tines until they hit the hardpan. Then move forward in small increments while pushing down slightly as you go.
With a spade fork, jab straight down into the ground with full force and then wiggle side-to-side until you reach the hardpan.
Once you do this all around your garden bed, mix in some compost or aged manure to help loosen up the dirt and make sure there are no large chunks left behind.
Planting cover crops like clover or winter rye can also add organic matter to your soil over time and will help improve its texture even further.
Finally, once you’re done breaking up the hardpan and adding organic material to your soil, it should be ready for planting come springtime!
Adding Fertilizer And Nutrients
Once the soil has been cleared of any debris, it’s time to add nutrients.
This will help ensure that your garden is healthy and thriving in the coming year. Start by leaving the rest of the ground as-is for now – you’ll be aerating later on.
When adding fertilizer, choose a product specifically designed for gardens or lawns; this will provide essential minerals and nutrients missing from the soil.
It’s important to spread it evenly across your plot so that every part of your garden receives an equal amount of care. You can use a rake to make sure it’s distributed properly before moving on to the next step.
Finally, apply mulch over the top of the fertilizer once everything has been laid down correctly.
Mulch helps retain moisture in between watering sessions and prevents weeds from sprouting up throughout your garden space.
Make sure you have enough mulch spread around each plant bed to give them all ample coverage! With these steps complete, it’s time to start aerating the soil for optimal air circulation.
Aerating The Soil
Aerating will help ensure that vital air gets into the root zone of plants so they can absorb oxygen and essential minerals.
The best way to do this is to use an organic material like winter wheat or composted manure as a top dressing.
Spread these materials on top of the soil surface, then turn them in with a shovel or garden fork. Doing this helps break up compacted soils while also providing additional organic matter for beneficial microbes.
You should also consider using a core aerator machine if possible – this device pulls out plugs of dirt from your yard, allowing more air circulation around plant roots and helping loosen clay-based soils.
Alternatively, you can let nature take its course by waiting for winter rains which naturally create channels between particles of soil and allow water drainage down through the layers.
However, be aware that too much rain could cause erosion damage in certain areas of your garden.
No matter what method you choose for aerating your soil, make sure you give yourself enough time before planting season arrives – healthy soil takes months to develop, so start early!
And don’t forget about choosing appropriate plants for the area; different types require different levels of care depending on local conditions such as climate and microclimate.
With some preparation now, next year’s garden will flourish!
Choosing Appropriate Plants For The Fall Vegetable Garden
Once the soil is prepped for next year’s garden, it’s time to think about what plants will be planted.
When selecting which plants to grow in a fall vegetable garden, consider the form of compost that was used as well as the climate and temperatures of your area.
It’s important to choose varieties of vegetables that have been bred specifically for cold weather growth and harvest within a short season.
Start by researching different types of vegetables and fruits you can plant in your area during the fall months.
Consider cool-weather crops such as kale, collards, broccoli, spinach, carrots, peas, potatoes, garlic, and radishes, or root vegetables like turnips and rutabaga.
Besides these veggies, think about adding some cover crops also. Cover crops are great additions to any garden because they add valuable nutrients back into the soil after being tilled under at the end of the growing season.
Legumes such as clover and alfalfa are good choices when planting cover crops.
Once you’ve decided on which type of edibles you’ll be cultivating in your new garden space take some time to plan out where everything should go based on their size requirements as well as how much sun each individual plant needs regularly throughout its life cycle.
Knowing this information ahead of time allows for better spacing so that all your plants can thrive together happily without competing with one another for resources such as water or sunlight.
Now it’s time to move on to weeding, mulching, and cover cropping–the last steps before sowing seeds!
Weeding, Mulching, And Cover Cropping
Now that you’ve chosen the right plants for your area, it’s time to prepare the soil.
Weeding is one of the most important steps in gardening and should be done regularly throughout the season. The best way to do this is by hand, but if necessary you can use a hoe or other tools.
Next up is mulching which helps retain moisture and suppress weeds. A layer of bark chips, shredded leaves, grass clippings, or compost will help keep your garden healthy.
Cover cropping is also beneficial as it prevents erosion and improves soil structure over time. You can plant a winter cover crop such as rye or hairy vetch after harvesting all summer crops for optimal results.
Taking these measures now will ensure that your garden has fertile soil come springtime when it’s time to start planting again!
Planting At The Right Time
Knowing when to plant can be key in ensuring a successful fall garden and preparing your soil for next year’s spring. The first step of this process is planting at the right time.
In order to prepare your soil properly, it’s important that you plan ahead and choose the ideal date to begin sowing seeds or transplanting plants into your garden.
Depending on where you live and what type of plants you’re growing, late summer or early autumn are usually good times to start getting ready for colder temperatures.
This will ensure that plants have enough time to mature before winter hits. If you want flowers blooming in the springtime, aim for September as the latest month possible so they have enough days left in their growth cycle by mid-February when frost sets in again.
Once the temperature begins dropping significantly and snow starts falling, it may be too late for some vegetables and perennials – but not all!
Some hardy, cold-weather crops such as broccoli, cauliflower, kale, Brussels sprouts, carrots, parsnips, and turnips can survive through freezing conditions if planted in October or November.
Furthermore, certain types of flowering bulbs including daffodils and tulips need cold temperatures in order to bloom beautifully come April.
So even though most gardening activities should wrap up around mid-autumn depending on the climate zone, there are still plenty of opportunities available for those looking to get creative with their outdoor space during later months too!
When choosing which plants will make an appearance in your landscape over the coming season consider both timing and variety carefully – this way you’ll maximize your chances of success while minimizing the risk associated with unfavorable weather patterns.
With these basics covered, you’ll soon be able to relax knowing that your garden is set up correctly for its upcoming journey into winter hibernation.
Now let’s move on to discussing ways we can keep everything watered and irrigated once things warm back up again!
Watering And Irrigation Techniques
Watering and irrigation help keep the plants hydrated, allowing them to absorb essential nutrients from the soil more efficiently.
Furthermore, proper watering can reduce weeds as well as help create a favorable environment for beneficial organisms like earthworms.
To ensure optimal water distribution through your garden bed it is important to select an appropriate system of sprinklers or drip irrigation that meets the needs of your specific crop.
When setting up a sprinkler system make sure you consider factors such as weather conditions and seasonal changes in light and temperature.
Consider using timers to automate watering at regular intervals so that you don’t have to worry about manually adjusting your settings every day.
Drip irrigation systems work best when combined with mulch which helps retain moisture throughout the growing season, ensuring maximum absorption of water by the roots of each plant in the garden bed.
This combination also reduces evaporation and runoff losses during summer months when temperatures increase significantly.
Plus, having an efficient drainage system will prevent overwatering problems which can lead to root rot diseases in crops if not addressed quickly enough.
With these tips in mind, you should be ready to begin rotating crops and crop rotation strategy with confidence!
Rotating Crops And Crop Rotation
Rotating crops and crop rotation are key components for a successful garden season. Planting the same type of crop in the same spot every year can lead to nutrient-depleted soil and pest infestations.
Crop rotation is the practice of growing different types of plants each year in the same area, allowing nutrients from one plant’s roots to be used by another plant’s roots.
In order to properly rotate crops, plan where certain vegetables will go before planting them when next spring arrives.
It helps if you map out your garden bed on paper or digitally so you don’t get confused about what was planted where last year and how much space needs to be left for rotating crops this upcoming spring.
Also, make sure not all root vegetables such as carrots and potatoes grow together because they draw up similar nutrients from the soil which could cause a depletion over time.
Also, keep in mind that some companion plants like nitrogen-fixing beans help replenish nitrogen into the soil which other plants need to thrive; while others like basil don’t get along with tomatoes due to competition for soil nutrition.
Rotating crops also helps prevent pests since many insects lay eggs near their food source each season making them easier to control without using chemicals–just move their favorite snack somewhere else!
To ensure optimal growth during next year’s harvest, start preparing your garden beds now by mapping out future locations of new seedlings, removing leftover vegetation from previous seasons, and adding compost or fertilizer as needed.
With the proper planning and preparation put into place before next spring arrives, you’ll have healthier plants ready for harvesting come summertime!
Protecting Garden Beds From Pests – Removing Diseased Plants!
One of the best ways to protect your garden beds from pests is by removing any diseased plants at the end of the season.
This helps prevent diseases and other issues that might carry over into the new growing season. Besides, fall gives you an opportunity to check around your garden bed for bugs or animals that may be causing damage.
Check under rocks and logs as well as between mulch layers and pull out anything that looks like it doesn’t belong there.
If you find a problem with current pests, take steps to address it immediately before they can spread further throughout your garden bed.
Some methods for pest control include using traps, chemical sprays, or natural repellents such as garlic oil or neem oil spray.
Another option would be introducing beneficial insects such as ladybugs which will help keep potential harmful critters away from your plants and flowers.
No matter what method you choose, make sure you are diligent about maintaining consistent pest prevention efforts so that when spring arrives your garden bed will be ready for planting!
Taking these steps now will ensure a successful gardening experience come next season.
Frequently Asked Questions
What Is The Best Way To Keep Weeds Out Of The Garden?
First of all, start by tilling the soil before planting season begins. This will help loosen up any compacted areas and expose any potential weed seeds so you can remove them before they have a chance to germinate.
Besides, adding some organic matter such as compost or manure will help improve drainage and add nutrients to the soil which will also help with weed prevention.
Once the soil has been prepped, use a layer of mulch around your plants to further deter weeds from sprouting up. Mulch not only helps protect against new weeds but also serves as an insulator for your plant’s roots during the colder months.
Make sure you choose an appropriate type of mulch though – one made from natural materials like grass clippings or wood chips works best since synthetic ones may contain chemicals that could harm surrounding vegetation.
Ultimately, these steps should give you peace of mind with regard to keeping weeds out of your garden this upcoming year.
Taking proactive measures now will save time (and frustration!) down the road and allow you to enjoy a beautiful yard without having to worry about stubborn invaders getting in the way
How Often Should I Fertilize My Garden?
First, let’s look at frequency: most gardens need to be fertilized two or three times a year.
Depending on where you live, this could mean early spring before planting begins, mid-summer when growth peaks and late fall after harvest has finished.
You may also want to adjust these intervals based on what types of crops are being grown in your garden – some vegetables require more frequent feeding than others.
Next up is type: organic or synthetic?
Organic fertilizers provide slow-release nourishment over time while synthetics work quickly but don’t last as long.
Both have their advantages depending on your gardening goals – if you’re looking for fast results then go with a synthetic option; otherwise, an organic choice might be best.
Also, consider any special requirements certain veggies may have – tomatoes love calcium so make sure they get plenty!
No matter which way you go about fertilizing your garden, regular maintenance will keep weeds out and reward you with abundant harvests every season.
Keep track of when and how much fertilizer you’re giving to ensure optimal performance from your soil and plants.
How Much Water Should I Give My Plants?
As for watering, the most important thing is to know your plants’ individual needs.
Some plants prefer more frequent but shallow watering while others need less often but deeper soaking.
Different climates will also affect the amount of water needed depending on humidity levels in the air or whether there has been recent rainfall.
To ensure healthy growth, gardeners need to keep track of their plant’s soil moisture level each day.
If dryness persists then it’s time to give some extra love by adding more water – this can be done using irrigation systems or manually by hand-watering yourself.
Don’t forget to check if there are any drainage issues before turning on the taps!
Once you understand what kind of environment your particular species thrive in and have developed a good watering routine, you’ll find that looking after your garden becomes easier over time as you become attuned to its specific needs.
What Type Of Mulch Should I Use?
When selecting mulch for your garden, there are several factors to consider: texture, color, cost, and biodegradability.
Different textures provide different benefits; looser materials like straw or pine needles allow water to penetrate more easily while denser materials like wood chips will last longer in wet weather.
The color of the material can also make a difference – dark materials absorb heat better than light-colored ones.
Organic mulches tend to be more expensive but will break down over time and add valuable nutrients back into the soil.
No matter what type of mulch you select, use it liberally around plants – three inches deep at minimum. This will prevent weeds from germinating and protect roots from temperature extremes.
As an added bonus, when used correctly it’s not only good for your plants but also looks nice too!
Choosing the right kind of mulch for your garden should be based on your needs and preferences. Think about texture, color, costs, and biodegradability before making a decision that best suits you and your garden’s needs.
You’ll soon see results with healthier plant life and improved garden soil structure!
How Can I Protect My Garden Beds From Pests?
One great way to prevent insect damage is by using mulch around the base of each plant or shrub. Mulch acts as a barrier between the soil and stems that keep bugs out while also retaining moisture for healthier roots.
And, adding organic materials such as compost or manure will provide additional nutrients and will improve soil structure which helps resist pest infestation.
Another effective measure is to place physical barriers such as plastic sheeting around vulnerable plants; however, this method should only be used if nothing else works since it can inhibit water absorption and trap heat inside the bedding area.
Finally, one of the best ways to reduce potential pest damage is through companion planting.
Companion planting involves strategically placing certain types of plants near others so they help deter pests – for example putting marigolds next to tomatoes increases their resistance to nematodes (tiny worms).
It’s also helpful to rotate crops every year so that disease-prone areas are avoided annually – this minimizes loss due to crop failure caused by persistent pathogens in the soil.
Summing Up
It’s important to remember that taking care of your garden soil is an annual task. It may seem like a lot of work, but it pays off in the end with better yields and healthier plants.
Taking the time to properly prepare your garden soil for next year will give you great rewards.
I’ve learned through personal experience that one of the best ways to keep weeds out of my garden is by using mulch.
Not only does it help suppress weed growth, but also helps retain moisture for thirsty plants during hot summer days. Plus, mulching can be done relatively quickly and easily each year!
Finally, having healthy soil means being proactive about pest control too. Regularly checking for any signs of pests or diseases can go a long way in keeping them from spreading throughout your entire garden bed.
According to recent studies, early detection and removal can result in up to 90% fewer infestations than those who wait until they are established.[1]
So take some time this year before winter sets in to make sure your garden soil is prepared for success to come springtime!
With just a few simple steps, you’ll have lush vegetation flourishing in no time.

Leave a Reply